



Star nails are an easy way to add personality to a manicure without covering every nail in detailed art. You can wear one tiny star on a nude base, create a constellation across two accent nails, or pair metallic stars with a dark polish for a bolder celestial look. The best results come from choosing a clear color combination, keeping the placement balanced, and sealing the design properly.
This guide explains the most flattering star nail placements, four ways to create star designs, color combinations, and practical tips for making your nail art last.
AI Overview: What Are Star Nails?
Star nails are manicures decorated with small or large star shapes, often inspired by celestial themes such as night skies, moons, and constellations. Popular styles include gold stars on black polish, silver stars on milky white, and delicate white stars on navy. You can create them with nail stickers, stamping plates, dotting tools, or a fine nail-art brush.
Key Takeaways
- Star nails suit short and long nails, from minimalist manicures to detailed celestial designs.
- One or two accent nails can create a balanced look without overcrowding the set.
- Stickers are the easiest method for beginners; stamping and hand-painting offer more control.
- Black with gold or silver, milky white with silver, and navy with white are versatile color combinations.
- Thin application, flat sticker edges, and a suitable top coat help protect the design.
- Keep nail health in mind and avoid applying products over damaged or irritated nails.
Why Star Nail Designs Are So Popular
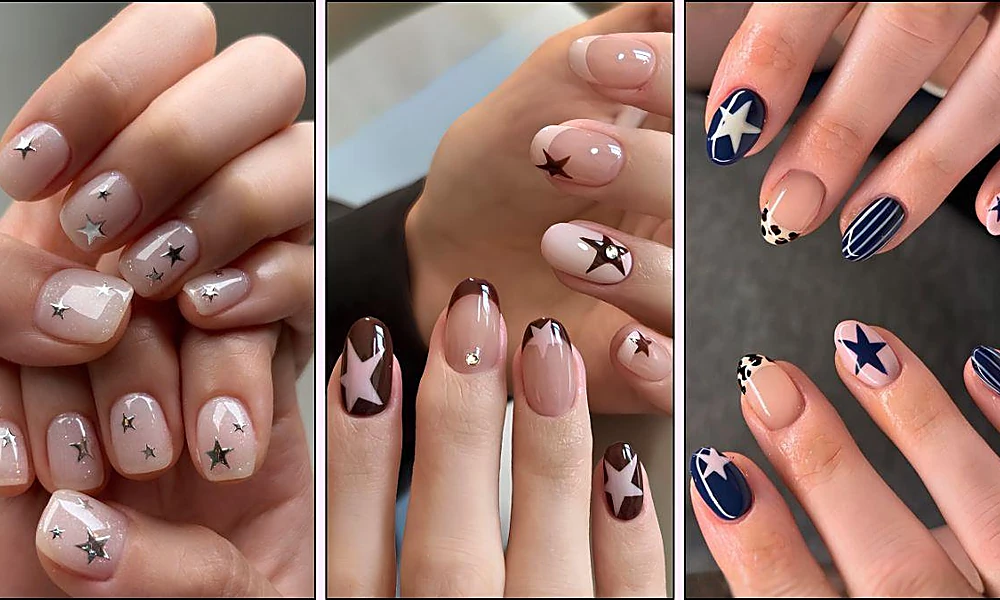
Stars are simple shapes, but they offer plenty of design options. A single small star can make a neutral manicure look more interesting, while several stars in different sizes can create a night-sky effect.
Another advantage is that star nail art works with different nail lengths and shapes. Short nails can carry tiny stars near the cuticle or center, while longer nails have more room for clusters, French tips, and detailed celestial designs.
The motif also adapts to different styles:
- Minimalist: One small star over a sheer pink or nude base.
- Glamorous: Gold or silver stars with metallic polish and rhinestones.
- Romantic: Fine gold stars on blush pink or milky white.
- Edgy: Metallic stars over glossy black.
- Seasonal: White stars on navy or deep red for a winter-inspired look.
If you want more inspiration beyond celestial designs, explore these cute nail ideas for other ways to style your manicure.
Star Nail Placements That Look Balanced
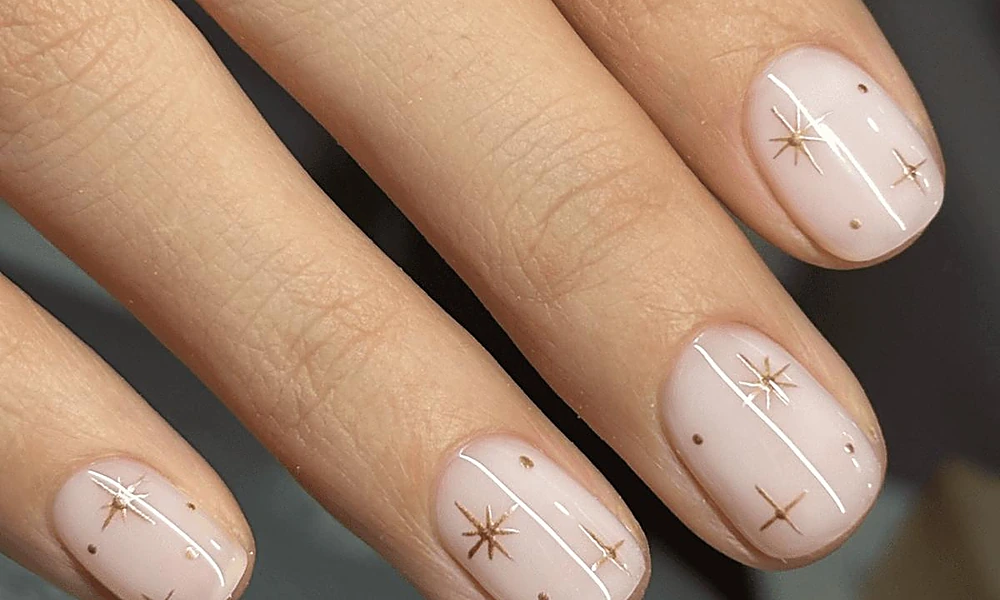
The placement of the stars can change the entire appearance of your manicure. Instead of adding decorations randomly, decide where you want the eye to focus.
1. One Star on Each Ring Finger
This is one of the simplest ways to try the design. Keep the rest of your nails in a solid shade, then add one small star to each ring finger. It works particularly well with nude, blush, milky white, and soft beige polish. Choose gold for a warmer finish or silver for a cooler look.
2. Tiny Stars Near the Nail Tips
Place two or three small stars near the free edge of a nail. This creates a subtle constellation effect without covering the whole nail. The design works on short and medium-length nails, especially when you use a sheer or transparent base.
3. Stars Near the Cuticle
A small star near the base of the nail creates a delicate accent. You can place one star in the center or position a few tiny stars slightly to one side. Keep the design away from the surrounding skin and cuticle area. This makes the manicure look cleaner and helps prevent polish or adhesive from sitting on the skin.
4. Star French Tips
For a creative French manicure, add a small star near the tip instead of using only a traditional curved line. Another option is to keep the French tip intact and place a tiny star beside it. A nude base with white stars gives a soft finish, while black tips and silver stars create stronger contrast.
5. Full Accent-Nail Sky
If you enjoy detailed nail art, dedicate one nail on each hand to a small star-filled sky. Combine different star sizes with tiny dots or a few delicate sparkles. Keep the remaining nails relatively simple. This gives the detailed accent nails room to stand out.
A useful design rule: Varying star sizes and leaving some empty space often creates a more balanced result. Odd-numbered groups can be a helpful styling choice, but they are not a strict rule. The overall spacing matters more than counting every star.
How to Create Star Nails: Four Easy Methods
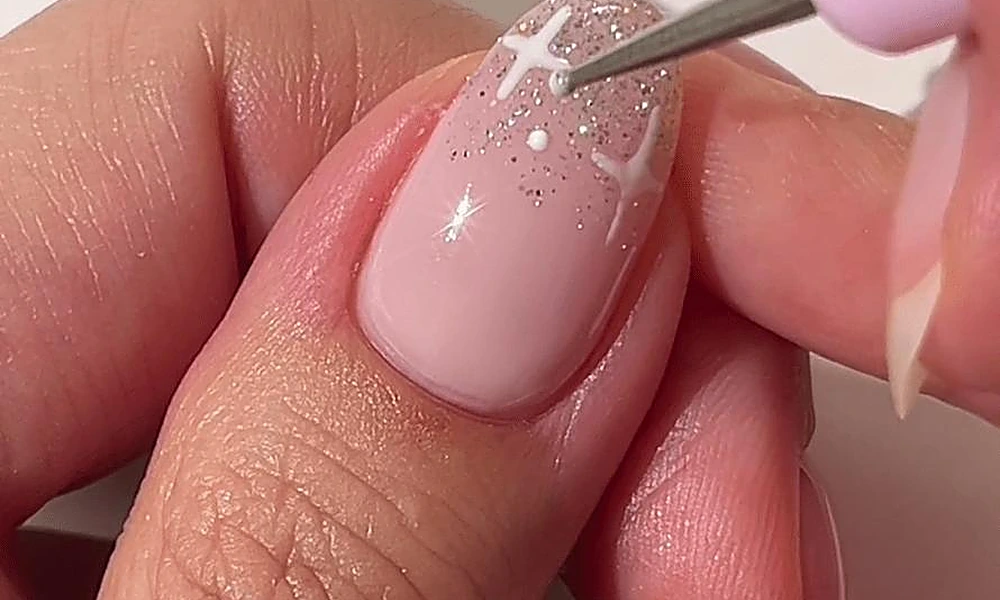
You do not need advanced nail-art skills to create a star manicure. The best method depends on how precise you want the design to look and how comfortable you are working with small details.
1. Use Nail Stickers or Decals
Star stickers are the easiest option for beginners. They come in different sizes, colors, and finishes, including gold, silver, and holographic designs.
How to apply them:
- Apply your base color and let it dry completely.
- Pick up a star decal with tweezers.
- Place it gently on the nail.
- Press down the edges without stretching or folding the sticker.
- Apply a suitable top coat after the design is secure.
Stickers are useful when you want matching stars across several nails without drawing each one by hand.
2. Try Nail Stamping
Nail stamping uses a patterned metal plate, stamping polish, a scraper, and a stamper. The star design transfers from the plate onto the nail. This method is useful when you want sharp, consistent shapes. Dedicated stamping polish generally gives more reliable transfers than formulas that dry too quickly. Before working on your manicure, practice picking up the design and transferring it onto a spare nail tip.
3. Make Simple Stars With a Dotting Tool
A dotting tool can create a rounded star-like shape. Place several small dots around a center point, then connect or slightly pull them outward with a fine tool while the polish is still workable.
This method is especially useful for tiny decorative stars. The result may look softer and more rounded than a traditional five-point star.
4. Hand-Paint Stars With a Fine Brush
A thin nail-art or striping brush gives you the most control over the shape and placement.
To create a classic five-point star:
- Paint a thin line from the top point toward the lower-left point.
- Continue the outline through the lower-right point.
- Connect the right point to the upper-left point.
- Finish by joining the upper-left point to the top.
- Fill the shape if you want a solid star.
Use a small amount of polish on the brush. Thick strokes can blur the points and make a tiny star look like a blob.
Finish the design: Once the art is dry enough for your chosen polish system, apply a compatible top coat. Follow the product’s instructions, especially if you are using gel products that require lamp curing.
Best Star Nail Color Combinations
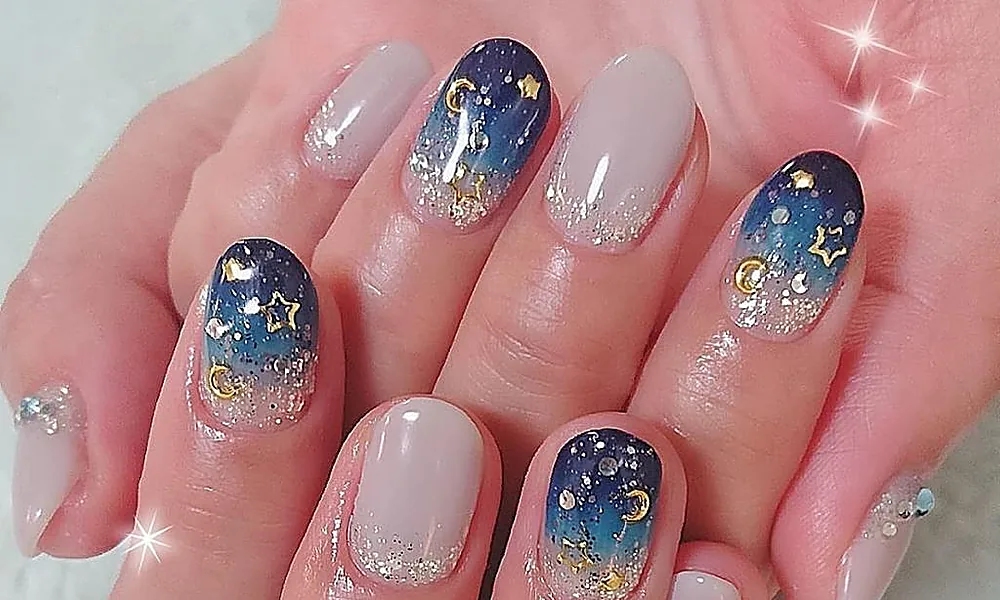
The base color and star finish determine whether your manicure looks soft, dramatic, or festive. Strong contrast makes small stars easier to see, while similar shades create a quieter effect.
| Base color | Star color | Overall style |
| Glossy black | Gold or silver | Bold, evening-ready |
| Milky white | Silver or chrome | Clean and minimalist |
| Deep navy | White | Classic night-sky look |
| Blush pink | Gold | Soft and romantic |
| Deep red | Gold or white | Festive and seasonal |
| Sage green | White | Fresh and understated |
| Nude beige | Gold | Subtle everyday elegance |
Black Nails With Gold or Silver Stars
Black polish creates a strong background for metallic star designs. Gold gives the manicure a warmer, more glamorous appearance, while silver creates a cooler finish. You can keep the look simple with one star on each accent nail or add small metallic details across the set. For more inspiration, see these glossy black nail ideas.
Milky White Nails With Silver Stars
A milky white base gives star nail art a softer appearance. Add small silver stars or chrome details for a clean, understated manicure. This combination is a good choice if you prefer delicate nail art rather than a dark or high-contrast design.
Red Nails With Gold Stars
Deep red and gold create a rich combination that works particularly well for parties and winter celebrations. You can also use small white stars for a more playful finish.
For additional color inspiration, browse these red nail designs. If you are planning a seasonal manicure, you can also explore these Christmas nail ideas.
How to Make Star Nail Art Last Longer
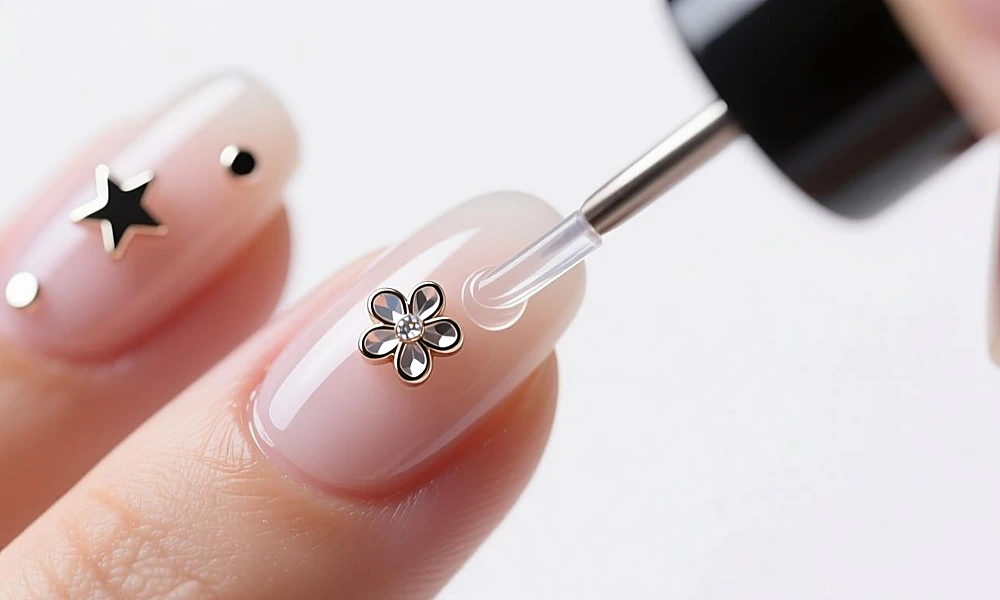
Small decorations can lift or catch on clothing if they are not applied properly. A few careful steps can help protect the finished manicure.
Prepare the nail surface. Start with clean, dry nails. Remove old polish and follow the preparation instructions for your chosen nail product.
Apply thin layers. Thick polish takes longer to dry and can make detailed designs look uneven. Let each layer dry or cure as directed.
Secure sticker edges. Check that decals lie flat before applying top coat. Avoid placing stickers too close to the skin or cuticle.
Seal the design. Apply a compatible top coat over the artwork. Cover the free edge where appropriate, but avoid flooding the surrounding skin.
Protect your manicure during chores. Wear gloves when washing dishes or using cleaning products. Repeated water exposure and household chemicals can affect both your nails and manicure.
Refresh regular polish when needed. A thin top-coat refresh may help restore shine, but it will not repair a design that has already lifted. Follow the product instructions rather than repeatedly layering thick coats.
The American Academy of Dermatology’s healthy nail tips also recommend protecting nails from excessive water exposure and avoiding habits that can cause splitting or damage.
Common Star Nail Mistakes to Avoid

A few small mistakes can make celestial nail art look messy or cause it to wear poorly.
- Using too many decorations: Stars, rhinestones, moons, and glitter can compete with one another. Choose one main detail and use the others sparingly.
- Making every star the same size: A mix of small and medium stars often creates a more natural constellation effect.
- Choosing low contrast: Silver stars may disappear against a pale silver base. Pick a combination where the shapes remain visible.
- Painting with too much polish: Thick strokes can hide the points of a star. Use a fine brush and a small amount of product.
- Applying stickers over wet polish: This can cause the decal to move, wrinkle, or lose its shape.
- Ignoring nail health: Do not cover damaged or irritated nails just to complete a design. The AAD’s manicure and pedicure safety guidance explains why clean tools and careful cuticle handling matter.
Frequently Asked Questions About Star Nails
What is the easiest way to create star nails?
Nail stickers and decals are the easiest options for beginners. Apply them to a fully dry base color, position them with tweezers, and seal them with a compatible top coat.
What tool is best for drawing stars on nails?
A fine striping brush is best for creating traditional five-point stars. A dotting tool works for simpler, rounded star shapes. If you want identical designs on several nails, stamping plates or stickers may be easier.
Do star nails look good on short nails?
Yes. Small stars work well on short nails because they do not need much space. Try one star near the center or cuticle area, or use a tiny cluster near the tip. Avoid covering the entire nail with large decorations.
Which colors look best with star nail art?
Black with gold or silver is a bold combination. Milky white with silver looks minimal, navy with white creates a night-sky effect, and blush pink with gold gives a softer appearance. The best choice depends on whether you want contrast or a subtle finish.
Can I create star nails without a nail-art brush?
Yes. Stickers, decals, and stamping plates let you create star designs without painting them by hand. A dotting tool can also make simple star-like shapes.
How do I stop star nail stickers from peeling?
Apply stickers to a completely dry base, press their edges flat, and seal them with a compatible top coat. Avoid placing them too close to the nail edges or surrounding skin, where they are more likely to catch.
Final Thoughts
Star nails are versatile because the same small motif can create several different looks. A single gold star on a nude base feels understated, while metallic stars on black make a stronger statement. Choose a base color that gives your stars enough contrast, decide where you want the main details, and avoid adding decorations to every nail.
If you are new to nail art, start with stickers or a simple accent nail. Once you are comfortable with the placement, try stamping or hand-painting to create a more personal celestial design.









