



Simple Christmas nails prove that you do not need complicated nail art to enjoy a festive manicure. A thin red French tip, one tiny snowflake, or a few candy-cane stripes can give your nails a holiday look without covering every finger in decorations. These designs are also easier to create at home and suit both short and long nails.
Below, you will find easy Christmas nail ideas, beginner-friendly application steps, the basic supplies you need, and practical ways to help your manicure stay neat through the holiday season.
AI Overview: What Are the Best Simple Christmas Nail Designs?
The easiest simple Christmas nail designs include red or green French tips, a single snowflake accent, candy-cane stripes, gold stars, and milky white nails with subtle glitter. For a minimalist look, use a neutral or sheer base and add one festive detail. Red, forest green, white, gold, and silver are versatile holiday colors that work well together.
Key Takeaways
- Red and green French tips, snowflake accents, star stickers, and glitter tips are easy Christmas nail designs.
- A neutral or milky base makes small festive details stand out.
- Short nails look great with thin tips and small decorations.
- Thin polish layers and enough drying time help prevent smudges and dents.
- Gloves, hand cream, and cuticle oil help protect your manicure during holiday activities.
- Choose your manicure timing based on whether you use regular polish, gel, or press-ons.
10 Simple Christmas Nail Designs to Try

You can create a festive manicure with just a few colors and small details. The key is choosing one main design rather than decorating every nail with a different pattern.
1. Classic Red French Tips
Replace traditional white French tips with a thin red line. Keep the rest of the nail nude, sheer pink, or milky white. This design is simple enough for everyday wear but still feels festive. It also works particularly well on short nails because the thin line adds color without taking up too much space.
2. Deep Green French Tips
Forest green gives a Christmas manicure a seasonal touch without looking overly decorative. Apply a sheer nude base and paint a narrow green line along each tip. For a slightly dressier finish, add one tiny gold dot or a thin metallic accent to an accent nail.
3. One Snowflake Accent Nail
A snowflake on one nail can make a plain manicure feel winter-ready. Start with a milky white, pale pink, or transparent base, then add a small white snowflake to the ring finger. A fine nail-art brush gives you more control, while a dotting tool can help create the center and smaller details. Keep the snowflake small so it does not overwhelm the nail.
4. Candy-Cane Stripe Accent
Candy-cane stripes are a recognizable holiday design. Instead of painting every nail with red and white lines, use the pattern on just one accent nail. Apply a white base and add two or three thin red diagonal lines. A striping brush or nail-art liner makes it easier to keep the lines even.
5. Milky White Christmas Nails
Milky white polish creates a clean, soft base that works with almost any holiday detail. Wear it on its own for a minimalist manicure or add a small silver star, a little glitter, or one snowflake. This is a useful choice if you want festive nails that will still look appropriate after Christmas.
6. Nude Nails With Gold Stars
A nude or sheer pink base with tiny gold stars gives you a subtle festive look. Place one star on each ring finger or create a small cluster near the tip. Gold stickers are the easiest option if you do not have a steady hand for nail art. You can also explore more ideas in this guide to star nail designs.
7. Red and White Minimalist Nails
Red and white are classic Christmas colors, but they do not need to appear in elaborate patterns. Try alternating solid red and milky white nails, or add a thin white line to a red accent nail. Keep the shapes simple and use a glossy top coat to bring the colors together.
8. Silver Glitter Tips
If you like a little sparkle, apply fine silver glitter only to the tips of your nails. A nude or milky base keeps the design balanced. You can create a glitter fade by concentrating the sparkle near the free edge and using less glitter as you move toward the center.
9. Burgundy Christmas Nails
Burgundy offers a deeper alternative to bright Christmas red. It looks polished on short, square, oval, and almond-shaped nails.
Wear it as a solid glossy manicure or add one small gold detail. For more color inspiration, see these burgundy nail ideas.
10. Simple Red Nails With One Gold Accent
A glossy red manicure is already festive. To make it feel more special, add a small gold star, dot, or metallic line to one nail on each hand. This design is ideal if you prefer a classic manicure and do not want to spend time painting detailed patterns.
Simple Christmas Nail Designs Compared

Use this quick comparison to choose a design that matches your time and experience.
| Design | Approximate active time | Skill level |
| Red or green French tips | 15–20 minutes | Beginner |
| One snowflake accent | 15–25 minutes | Beginner to intermediate |
| Candy-cane stripe accent | 15–20 minutes | Beginner to intermediate |
| Milky white manicure | 10–15 minutes | Beginner |
| Nude nails with star stickers | 10–15 minutes | Beginner |
| Silver glitter tips | 15–20 minutes | Beginner |
| Burgundy full set | 10–15 minutes | Beginner |
| Red nails with gold accents | 15–20 minutes | Beginner |
Times are estimates for application and basic nail art. They do not include the full drying time required between regular-polish layers.
How to Do Simple Christmas Nails at Home
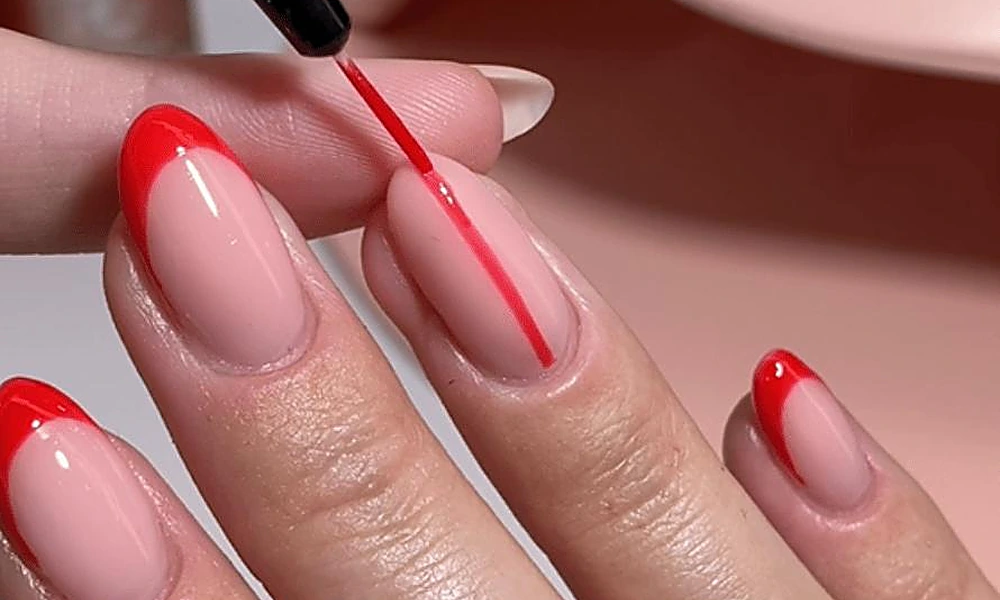
A red or green French tip with one accent nail is a practical starting point. You only need a few products, and you can keep the design simple enough to finish without advanced nail-art skills.
What You Need
Gather these supplies before starting:
- Nail file and gentle buffer
- Nail-polish remover or nail cleanser
- Base coat
- Sheer pink, nude, or milky white polish
- Red or deep green polish
- White polish for small details
- Fine nail-art brush or dotting tool
- Quick-dry top coat
You do not need every item for every design. If you are using stickers, for example, you can skip the nail-art brush.
Step 1: Prepare Your Nails
Remove old polish and shape your nails with a file. Make sure the nail surface is clean and dry before applying new products. Avoid cutting or aggressively pushing back the cuticles. The skin around the nail helps protect it, so rough preparation can irritate.
Step 2: Apply a Base Coat
Apply one thin layer of base coat and allow it to dry according to the product instructions. A base coat helps create a more even surface and may reduce direct contact between pigmented polish and the natural nail. It does not guarantee that staining will never occur.
Step 3: Add Your Base Color
Apply one or two thin coats of sheer pink, nude, or milky white polish. Let each coat dry before adding another. Thin layers are easier to control and generally dry more evenly than one thick layer.
Step 4: Create the Christmas Detail
Choose one design:
- Paint a thin red or green line along the tips.
- Add a small white snowflake to one accent nail.
- Use a sticker to create a gold star.
- Paint a few red diagonal lines over a white base.
- Add a small amount of silver glitter to the tips.
If you are new to nail art, practice on a spare nail tip or a piece of paper first.
Step 5: Apply Top Coat
Once the design is dry enough for the top coat you are using, apply a thin finishing layer. Cover the design and, where appropriate, lightly seal the free edge. Follow the product’s drying instructions. A quick-dry top coat can reduce surface drying time, but it does not mean the entire manicure is instantly hardened.
What Colors Do You Need for Simple Christmas Nails?

You can create many holiday designs with a small collection of basic colors.
| Polish color | How to use it |
| Classic red | French tips, full-color nails, and candy-cane details |
| Forest green | French tips and simple accent designs |
| Milky white | Base color, snowflakes, and clean minimalist looks |
| Nude or sheer pink | Neutral base for festive details |
| Gold | Stars, dots, and metallic accents |
| Silver | Glitter tips and winter-inspired details |
| Burgundy | A deeper alternative to traditional red |
If you want to explore more seasonal color combinations, the Christmas nail guide offers additional holiday inspiration.
How to Make Your Christmas Manicure Last Longer

Holiday activities can be tough on nail polish. Cooking, washing dishes, wrapping gifts, and frequent handwashing can all contribute to wear around the edges.
A few simple habits can help protect your manicure.
Use thin coats. Thick layers may stay soft underneath even when the surface feels dry. Apply polish in thin layers and allow enough drying time between them.
Seal the free edge. When applying base coat, color, and top coat, lightly cover the nail’s free edge where the product instructions allow. This can help reduce early edge wear.
Wear gloves for cleaning. Dishwashing and household cleaning expose your nails to water and chemicals. Wear suitable gloves when doing these tasks.
Moisturize regularly. Apply hand cream after washing your hands and use cuticle oil to reduce dryness around the nails.
Avoid picking at chips. If polish begins to lift, do not peel it off. Smooth a rough edge carefully and repair the affected area if possible.
Refresh your top coat when needed. For regular polish, a thin fresh layer every few days may help maintain shine and protect the surface. Avoid building up thick layers.
The American Academy of Dermatology’s healthy nail tips explain additional habits that help protect natural nails.
When Should You Do Your Christmas Nails?

The best timing depends on the polish type and the event.
- Regular polish: Apply it one or two days before the occasion if you want the manicure to look fresh. Allow enough time for proper drying.
- Gel polish: A salon gel manicure can be scheduled closer to the holiday, depending on your usual wear and regrowth. Gel must be cured under the correct lamp during application.
- Press-on nails: Apply them according to the manufacturer’s instructions and consider doing so close to the event rather than far in advance.
If you are considering gel, read the AAD’s advice about gel manicures, including precautions that can help reduce nail damage.
Common Mistakes to Avoid With Christmas Nail Art
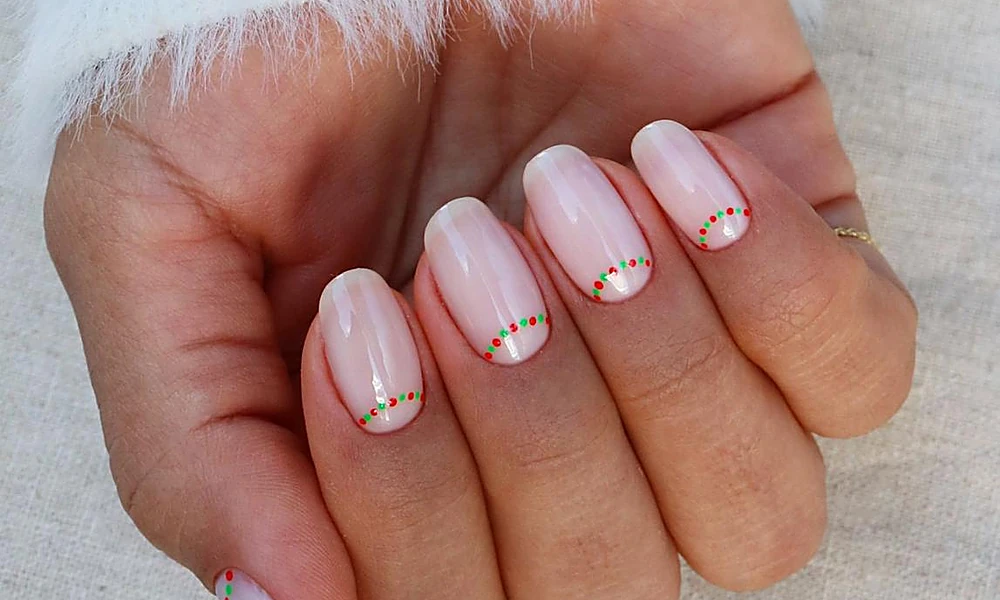
Even a simple design can look untidy if the application is rushed.
- Using thick polish layers: They take longer to dry and are more likely to dent.
- Making French tips too wide: A narrow line usually looks more balanced on short nails.
- Adding too many details: One or two accent nails can be more effective than decorating every finger.
- Applying stickers over wet polish: This can cause them to slide, wrinkle, or lift.
- Skipping the base coat: Strongly pigmented colors may stain natural nails.
- Going to bed too soon: Regular polish can still be soft underneath even when it feels dry to the touch.
- Ignoring nail irritation: Do not cover painful, inflamed, or damaged nails just to finish a holiday manicure.
For additional guidance, see the AAD’s recommendations for safe manicures and pedicures.
Frequently Asked Questions About Simple Christmas Nails
What is the easiest Christmas nail design for beginners?
A single star sticker on a nude or milky base is one of the easiest options. Red or green French tips are another beginner-friendly choice because they require only a steady line along the nail tip.
Do simple Christmas nails look good on short nails?
Yes. Thin French tips, small snowflakes, tiny stars, and solid festive colors all work well on short nails. Keep decorations small so the nail does not look crowded.
What colors are best for simple Christmas nails?
Red, forest green, white, gold, silver, nude, and burgundy are versatile choices. You can combine two or three colors for a festive look without making the design complicated.
How long does it take to do simple Christmas nails?
A basic full-color manicure may take around 10–15 minutes of application time. French tips and small accent designs can take around 15–25 minutes. Regular polish needs additional drying time, so do not plan only around the time spent painting.
How do I stop Christmas nail polish from chipping?
Apply thin coats, use a suitable base and top coat, and protect your hands with gloves when washing dishes or cleaning. Avoid picking at polish and refresh the top coat when needed.
When should I do my nails before Christmas?
For regular polish, one or two days before Christmas is a practical target, provided you have enough time for proper drying. Gel and press-on nails follow different application instructions, so plan around the product and your usual wear.
Final Thoughts
Simple Christmas nails are a practical choice when you want a festive manicure without spending hours on detailed nail art. A thin red French tip, a small snowflake, or a gold star can be enough to make your nails feel ready for the season.
Choose one design that suits your nail length and skill level, prepare your supplies before starting, and give each polish layer enough time to dry. With a little planning and gentle care, your holiday manicure can stay neat through the celebrations.









