

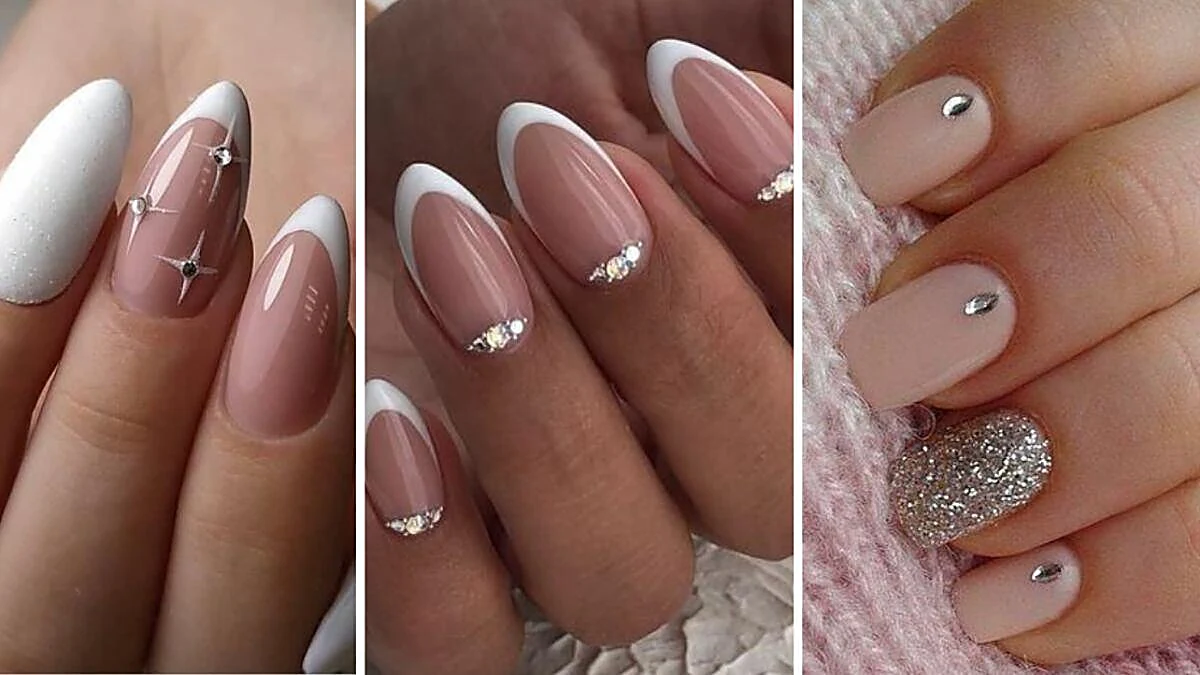

Diamond nails are manicures decorated with rhinestones, crystals, or reflective glitter to create a sparkling finish. You can keep the look subtle with one small gem near the cuticle, add a curved cluster, or cover an accent nail with crystals. The best result depends on choosing the right placement and adhesive and securing the stones without covering their reflective surfaces.
This guide explains the most wearable diamond nail designs, how to attach stones with nail glue or gel adhesive, and what to do when a gem comes loose. It also covers removal and nail-care precautions, so you can enjoy the sparkle without rough treatment of your natural nails.
Key Takeaways
- Diamond nails use rhinestones, crystals, or reflective glitter to create a gem-like manicure.
- A single stone or small cuticle cluster gives a subtle look; a full accent nail creates more drama.
- Use nail-specific glue or a compatible rhinestone gel rather than household adhesive.
- Seal around stones when the product instructions allow it, but avoid dulling their reflective faces.
- Diamond dust is a flat alternative if you do not want raised embellishments.
- Remove stones according to the adhesive instructions. Never pry them off.
What Are Diamond Nails?

Diamond nails are a style of nail art, not a manicure made with real diamonds. The name usually describes the bright, gem-like effect created by rhinestones, crystal embellishments, or reflective glitter polish.
Most designs use flat-backed stones made for nail art. They come in different sizes, shapes, and finishes, including clear, silver, iridescent, and colored options. Small crystals create a delicate sparkle, while larger stones give the manicure a more dramatic, three-dimensional look.
The important distinction is that rhinestones sit above the nail, while glitter polish lies flat. That affects comfort, application, maintenance, and removal.
6 Diamond Nail Designs to Consider

You do not need crystals on every finger to get a polished result. Start with the amount of detail that suits your routine.
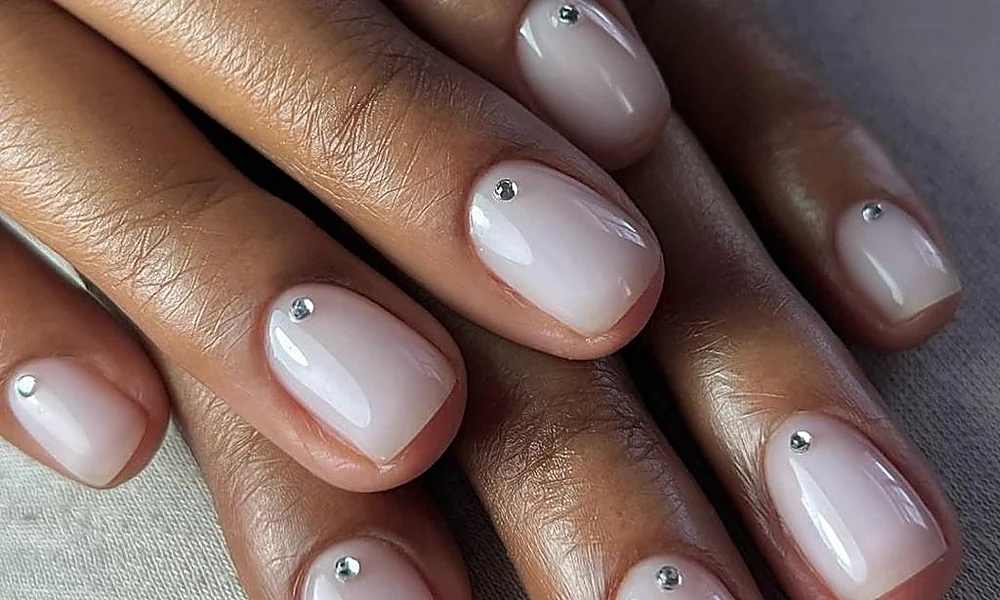
1. Single Rhinestone Nails
Place one small crystal near the cuticle or in the center of an accent nail. This is a simple option if you want a little shine without a heavily decorated manicure.
A clear stone works with almost any polish color. For a softer look, pair it with a sheer pink, milky white, or nude base.
2. Cuticle Cluster Nails
Arrange three to five small stones in a curved line near the base of the nail. The shape follows the cuticle area and creates a neat, jewelry-like detail.
Keep the stones small and close together. Large gaps can make the cluster look scattered rather than intentional.
3. Full Rhinestone Accent Nail
Cover one nail, often the ring finger, with small crystals. This gives you a strong focal point without adding raised stones to every finger.
Use stones of similar size for a tidy finish, or combine small and medium crystals for a more textured design. A flat-backed shape is generally easier to position than a rounded stone.
4. Rhinestone French Tips
Add tiny crystals along the French smile line or place one stone near the edge of each tip. This works particularly well when you want to keep the base simple.
Avoid placing large stones right at the free edge. That area is more likely to bump against objects during everyday activities.
5. Neutral Diamond Nails
Pair clear or silver rhinestones with a nude, beige, blush, or milky-white base. The neutral background lets the stones stand out without making the manicure look too busy.
For a balanced result, decorate one or two nails and leave the others in a glossy solid color.
6. Diamond Dust Nails
Diamond dust is a common name for reflective glitter or polish that creates a good, light-catching effect. It is not a single standardized nail product, so check the finish and particle size before buying.
Unlike rhinestones, glitter polish does not create a raised surface. It is a useful alternative if you dislike stones catching on hair, fabric, or gloves.
Rhinestone Placement: Which Style Is Right for You?

| Design | Where the detail goes | Best suited to |
| Single gem | One stone near the cuticle or center | Minimal sparkle |
| Cuticle cluster | Small stones curved along the nail base | Delicate, decorative detail |
| Accent nail | Most or all of one nail covered | A bold focal point |
| French-line gems | Along the French tip boundary | A classic manicure with extra shine |
| Scattered crystals | A few stones spaced across selected nails | A playful, less formal look |
| Diamond dust | Reflective glitter across the nail | Flat sparkle without raised stones |
A useful placement rule: stones near the cuticle are generally less exposed to knocks than stones near the free edge. If you use your hands frequently for typing, cleaning, or practical work, choose smaller crystals and keep them away from the tips.
How to Apply Rhinestones to Nails

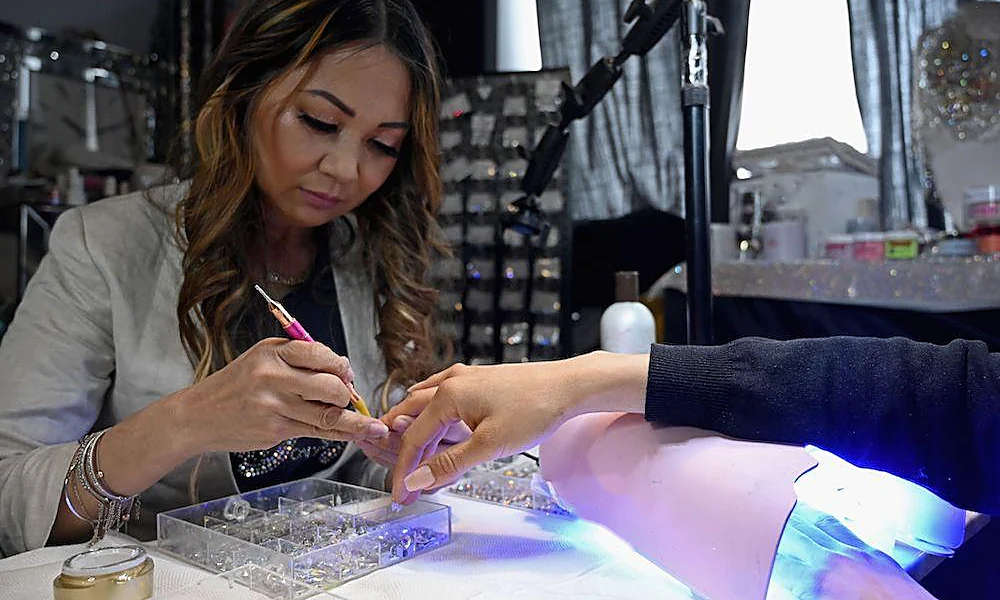
You can attach nail rhinestones with nail glue or a suitable gel adhesive. The right method depends on your base manicure and the product instructions. Do not use craft glue or household adhesive on your nails.
What You Need
- Flat-backed nail rhinestones
- Nail glue made for nail embellishments, or a compatible rhinestone gel
- Wax-tipped rhinestone picker or fine tweezers
- Nail polish or gel color
- A suitable top coat
- A UV/LED lamp if your chosen gel product requires curing
Method 1: Using Nail Glue
Nail glue is a practical option for adding stones over a regular polish manicure.
- Finish your base manicure. Shape your nails and apply your chosen polish. Let regular polish dry fully before adding the stones.
- Plan the placement. Arrange the crystals before applying glue. This helps you avoid stopping halfway through the design.
- Apply a small amount of glue. Put a controlled dot where each stone will sit. Too much adhesive can spread beyond the edges.
- Place the rhinestone. Pick it up with a wax pencil or tweezers and set it gently onto the glue.
- Allow it to set. Follow the adhesive manufacturer’s instructions. Do not assume every nail glue needs the same setting time.
- Check the edges. If the product instructions allow it, use a suitable top coat around the stone’s base. Avoid coating the crystal face if you want to preserve its facets and shine.
Method 2: Using Gel Adhesive
A rhinestone gel or nail-art gel can provide a secure setting when used with a compatible lamp and the manufacturer’s curing instructions.
- Apply and cure your base color as directed.
- Place a small amount of rhinestone gel where the crystal will go.
- Position the stone with a picker tool.
- Check that it sits evenly and that the adhesive is suitable for the stone’s size and shape.
- Cure the product using the specified lamp and curing time.
- If extra edge support is needed, apply a compatible finishing product around the base—not over the reflective face—then cure as directed.
Important: gel products do not all cure in the same way. A large or opaque embellishment can block light from reaching gel underneath it. Use a product designed for the size and type of embellishment, and follow its instructions rather than assuming any clear gel will work.
Which Application Method Should You Choose?
| Method | Main advantage | What to consider |
| Nail glue | No curing lamp needed | Use nail-specific glue and follow its setting instructions |
| Rhinestone gel | Can hold decorative elements securely | Requires a compatible lamp and correct curing |
| Regular top coat | Easy for lightweight, temporary decoration | Usually less secure than a dedicated adhesive |
For a few small stones over regular polish, nail glue is often the simpler choice. For a gel manicure or a more detailed design, use a compatible rhinestone gel system.
How to Make Diamond Nails Last Longer
There is no guaranteed wear time for rhinestones. Their staying power depends on the stone’s size, the adhesive, the nail surface, placement, and how much pressure the manicure receives.
These habits can help reduce early lifting:
- Choose smaller, flat-backed stones. They sit closer to the nail and are less likely to catch on objects.
- Keep stones away from the free edge. The tips of your nails experience frequent contact during daily tasks.
- Use the correct adhesive. A product designed for nail embellishments is a better choice than ordinary craft glue.
- Avoid excess product. Too much adhesive can leave a messy border and make the stone sit unevenly.
- Protect your nails during chores. Wear suitable gloves when cleaning or washing dishes.
- Do not pick at loose stones. If one starts lifting, avoid pulling it off along with the surrounding polish or gel.
You do not need to apply a fresh layer of top coat over the entire manicure every few days. In fact, coating the top of a faceted crystal can make it look cloudy and reduce its sparkle. Follow the adhesive system’s instructions for reinforcing the edges.
Diamond Dust vs. Rhinestones: What Is the Difference?
Both options create a sparkling manicure, but they feel and behave differently.
| Feature | Rhinestones | Diamond dust or reflective glitter |
| Surface | Raised, three-dimensional | Flat |
| Sparkle | Concentrated reflections from individual stones | Fine reflective shimmer across the nail |
| Application | Requires placement and adhesive | Applied like glitter polish |
| Snagging | Can catch on hair or fabric | No raised stones to catch |
| Maintenance | Individual stones may loosen | Wears like the polish underneath |
| Best for | Statement details and accent nails | Everyday sparkle and smooth finishes |
Choose rhinestones when you want visible texture and a jewelry-like effect. Choose reflective glitter when you prefer a smooth surface that is easier to wear day to day.
How to Remove Diamond Nail Designs Safely
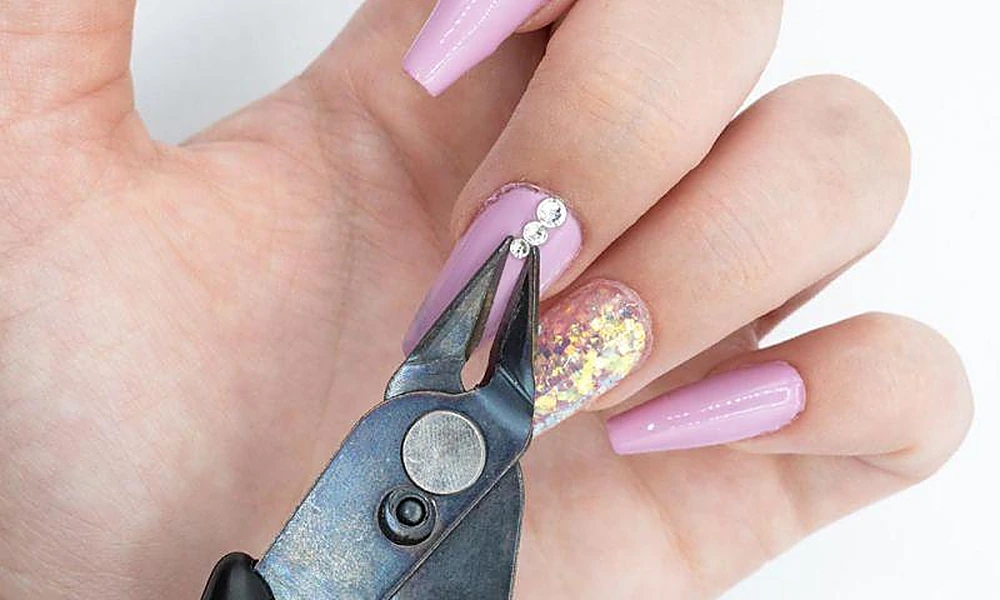
Do not pull, scrape, or pry rhinestones from your nails. A stone that seems loose may still be attached to polish or gel underneath. Forcing it off can remove layers of the natural nail.
The correct removal method depends on the products used:
- Rhinestones attached with nail glue: Follow the glue manufacturer’s removal instructions. Some products require a specific remover or careful soaking.
- Rhinestones attached with gel: The gel system underneath may need professional removal or the soak-off procedure specified by its manufacturer.
- Regular polish: Use an appropriate polish remover once the embellishments and adhesive have been safely removed.
If a stone is firmly attached, or you are unsure which adhesive was used, have a nail professional remove it rather than forcing it off.
Are Diamond Nails Safe for Natural Nails?

Rhinestones do not automatically damage natural nails. Problems are more likely to come from aggressive preparation, irritating products, repeated heavy enhancements, or forceful removal.
The American Academy of Dermatology notes that artificial nail products can contribute to nail damage and that some ingredients may cause allergic reactions. It also advises avoiding continuous use of artificial nails and choosing a salon that follows good hygiene practices. Read its guidance on reducing artificial nail damage.
Keep these precautions in mind:
- Do not let a technician aggressively file the natural nail to attach decorative stones.
- Avoid products that cause burning, itching, redness, or swelling.
- Do not cut or forcefully push back the cuticles.
- Take a break from artificial enhancements if your nails become thin, brittle, or painful.
- Seek advice from a dermatologist if you notice persistent nail changes or a skin reaction.
If you visit a salon, check that tools are cleaned and disinfected between clients. The AAD’s manicure and pedicure safety advice offers additional precautions.
When Do Diamond Nails Look Best?
Rhinestone manicures work well for events where you want your hands to stand out in photographs or alongside jewelry.
- Weddings: Try a sheer pink base with a small crystal cluster or a delicate rhinestone French line.
- Birthdays: Use a full accent nail or a scattered crystal design for a more noticeable finish.
- Parties: Mix stone sizes or use colored crystals for a playful look.
- Everyday wear: Keep the design to one or two small details, or choose diamond dust for a smooth finish.
The easiest way to keep the look balanced is to match the amount of decoration to the occasion and your daily routine. A few well-placed stones can be just as striking as a fully embellished set.
Frequently Asked Questions
What are diamond nails made of?
Diamond nails usually use artificial rhinestones, crystals, or reflective glitter polish. The name describes the sparkling appearance; it does not mean the manicure contains real diamonds.
How do you keep rhinestones from falling off your nails?
Use flat-backed nail stones, a suitable nail adhesive, and careful placement. Keep stones away from the free edge where possible, and follow the adhesive instructions. Avoid covering the crystal faces with top coat if that dulls their reflective finish.
Can you put rhinestones on regular nail polish?
Yes. Let the polish dry completely, then attach the stones with nail glue made for nail embellishments. Follow the glue’s instructions and avoid using household or craft adhesives.
Should you put top coat over rhinestones?
Usually, apply a compatible top coat around the base of the stones rather than over their faceted surfaces. A thick layer across the crystals can reduce their sparkle. Always follow the instructions for the adhesive and finishing products you use.
Are diamond nails suitable for short nails?
Yes. Short nails can look good with one small crystal, a tiny cuticle cluster, or a few stones near a French tip. Smaller embellishments are usually easier to wear on a shorter nail.
Can you remove nail rhinestones at home?
It depends on the adhesive and manicure underneath. Follow the product’s removal instructions, and never pry or scrape stones off. If the stones are firmly attached to a gel enhancement, professional removal is the safer option.
Final Thoughts
The best diamond nail design is not necessarily the one with the most stones. A small crystal near the cuticle, a neat French-line detail, or one carefully arranged accent nail can create plenty of sparkle without making the manicure difficult to wear.
Choose your design around your nail length and daily routine. Use an adhesive made for nail art, keep the crystal faces clear, and remove the embellishments patiently when it is time for a change.









