



The best press-on nails combine an accurate fit, a comfortable shape, a realistic finish, and an adhesive that suits how long you want to wear them. Olive & June is a strong choice for sizing and value, Glamnetic stands out for design variety and longer wear, and KISS imPRESS suits people who want a quick, glue-free application. Proper preparation and gentle removal matter just as much as the brand.
Key Takeaways
- The best press-on nails start with a close fit, not just an attractive design.
- Olive & June is worth considering for sizing options; Glamnetic offers varied designs; KISS imPRESS focuses on quick application.
- Glue-based kits are generally better for longer wear, while adhesive tabs suit temporary use.
- Choose a length and shape that work with your daily routine.
- Follow the specific brand’s application instructions rather than using the same method for every kit.
- Never pull or pry off a press-on that has not loosened.
- Check for skin irritation and avoid applying artificial nails over damaged natural nails.
You find a beautiful set of press-on nails, open the box, and discover the problem: none of the tips fit your nail beds properly. A few are too wide, others leave gaps at the sides, and the one that finally looks right starts lifting after two days. That is not a design problem. It is a fit and application problem.
The best press-on nails should fit your natural nails closely, feel comfortable, and stay attached for the length of time you need. Some kits are better for beginners, some offer more realistic finishes, and others suit people who want dramatic designs without a salon appointment.
This guide compares popular brands using published editor testing and retailer feedback, explains what to check before buying, and shows you how to apply and remove press-ons without treating your natural nails roughly.
Why Press-On Nails Have Become a Real Salon Alternative

Press-on nails used to have a predictable weakness: they looked convincing for a day, then one would fall off while you were washing your hair or opening a bag. Better sizing systems, improved nail shapes, and more varied finishes have made modern kits a more practical option.
They also solve a specific problem: not everyone wants to spend time and money on a salon appointment every time they want a fresh manicure. A press-on set can give you a coordinated look at home, whether you need short everyday nails or a detailed design for an event.
But they are not automatically cheaper in every situation. A low-cost set that fits badly and needs replacing twice may offer less value than a better-fitting reusable kit. Compare the cost per wear, not just the price on the box.
What to Look for in the Best Press-On Nails
A pretty design can distract you from the details that determine whether a set will actually work. Check these features before buying.
1. A useful range of sizes

Fit should come before color or nail art. Each press-on needs to cover your natural nail from sidewall to sidewall without sitting on your skin.
If a tip is too narrow, it can leave part of the natural nail exposed. If it is too wide, the edges may catch on hair, clothing, or other objects. Look for kits with plenty of size options, including smaller and larger tips.
A practical test: Place each tip against your natural nail before applying adhesive. If you cannot find a comfortable match, do not force the closest size to work.
2. An adhesive that matches your plans

Most kits use either nail glue or pre-applied adhesive tabs.
- Nail glue: Usually the better option when you want a longer-lasting manicure. Application takes more care, and removal must follow the product instructions.
- Adhesive tabs: Convenient for a short event or temporary manicure. They are generally easier to remove, but wear time is often shorter.
Neither option is automatically best. Choose glue for a longer planned wear period and tabs when easy removal matters more than maximum hold.
3. A shape and length you can live with

Long almond and coffin nails can look striking in photographs, but think about your actual routine. If you type all day, cook frequently, handle small objects, or work with your hands, a short round or squoval set may be more comfortable.
If you want a softer, more decorative look, explore Glamnetic nail designs for ideas before choosing a press-on shape.
4. A believable finish

A thick, overly curved tip can look artificial even when the color is beautiful. Look for a shape that follows your natural nail and a finish that does not appear bulky around the cuticle.
Glossy, sheer, French, and neutral finishes can look especially natural when the sizing is right. Chrome and detailed nail art can also look polished, but the fit still determines whether the final result looks convincing.
5. Value beyond the package price

Check how many nails are included, whether the kit provides spare sizes, what application tools come with it, and whether the tips can be reused. A set that costs slightly more may be better value if it gives you a closer fit or includes enough spare tips for replacements.
Best Press-On Nail Brands: What Published Reviews Say
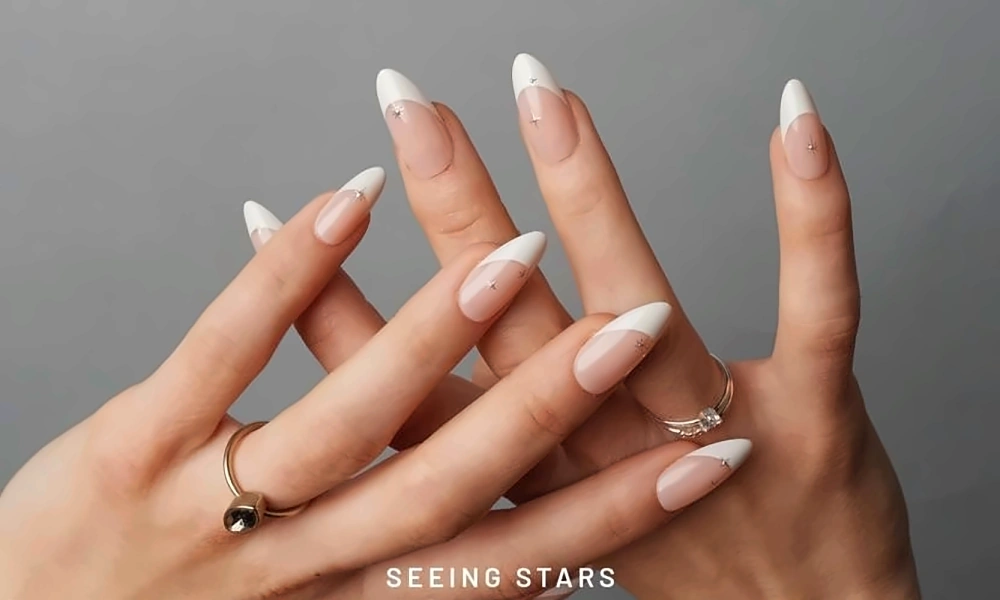
No single brand is best for every person. Published testing and customer feedback point to different strengths, so use the comparison below as a starting point rather than a guarantee.
| Brand | Best suited to | What published reviews highlight | What to consider |
| Olive & June | Fit and beginner-friendly kits | Good Housekeeping and Forbes Vetted highlight its wide size selection and accessible application | Some users may prefer a thicker tip |
| Glamnetic | Design variety and longer wear | Good Housekeeping highlights its design range and reports of extended wear from reviewers | Removal may take more time |
| KISS imPRESS | Quick application | Adhesive-backed styles avoid the separate glue step | Convenient wear may be shorter than a well-applied glue set |
| OPI xPRESS/ON | Salon-inspired shades | Offers recognizable polish-inspired colors and multiple styles | Check individual product reviews and fit before choosing |
Olive & June: A strong option for fit
Olive & June is worth considering if standard press-on kits rarely fit your nails. Its Instant Mani range includes a broad selection of sizes, and published reviews have praised the fit options and beginner-friendly setup.
Good Housekeeping’s 2026 roundup also highlighted the brand’s sizing range and application system. The main consideration is thickness: people who prefer a sturdier, thicker artificial nail may not love every style.
Glamnetic: For more elaborate designs
Glamnetic is a useful option when you want more than a basic nude or solid-color manicure. Its range includes different shapes, finishes, and detailed designs.
Good Housekeeping’s review notes that users report long wear from some Glamnetic sets. That does not mean every set will last the same amount of time on every person. Nail preparation, fit, adhesive, and daily activity still make a difference.
KISS imPRESS: For quick application
KISS imPRESS is designed for people who want to skip a separate glue application. The adhesive-backed format can make the process quicker and less messy, especially if you are new to press-ons.
The trade-off is wear time. If you need a manicure to last through a busy week, compare the specific product’s instructions with a glue-based kit before deciding.
OPI xPRESS/ON: For familiar salon-inspired colors
OPI’s press-on range is worth browsing if you prefer recognizable polish shades and classic manicure styles. It offers a range of colors and finishes, but do not choose a kit based on the brand name alone. Check the shape, size options, and recent reviews for the exact set you plan to buy.
Research note: Brand descriptions above summarize published editorial reviews and retailer information. They are not the result of independent hands-on testing for this article. Prices and product availability vary by retailer and location.
How to Apply Press-On Nails So They Stay On

A set can look excellent in the package and still lift early if the preparation is rushed. The goal is to create a clean, close fit and follow the adhesive manufacturer’s instructions.
Step 1: Prepare your natural nails
Remove old polish and wash your hands. Make sure your nails are completely dry before applying the tips.
If the kit recommends a prep wipe, use the one supplied. Avoid aggressive buffing. You want to follow the product instructions without unnecessarily thinning or roughening your natural nails.
Step 2: Match every size before using glue
Lay out the tips in finger order. Check that each one covers the nail without pressing into the surrounding skin.
If a tip is slightly too wide, follow the kit’s guidance on filing the sides. Do not use a narrow tip simply because it looks neater; exposed natural nail can make the fit uncomfortable and less secure.
Step 3: Apply the adhesive as directed
For glue-based kits, use the amount recommended by the manufacturer. Some systems call for glue on the natural nail, the artificial tip, or both. Others have a different application method.
Do not assume every brand uses the same technique. Too much glue can squeeze out around the edges, while too little may leave gaps.
Step 4: Position and press
Place the tip close to the cuticle area without pressing it onto the skin. Lower it carefully and press according to the kit’s instructions.
Hold it steady for the recommended time. Avoid shifting the tip back and forth once the adhesive begins to set.
Step 5: Give the adhesive time
Follow the product’s guidance about water, showers, and other activities after application. If the instructions recommend keeping your hands dry for a period, do not ignore that step.
A rushed application can undo the time you spent choosing the right set.
How Long Do Press-On Nails Last?

Wear time depends on the adhesive, the fit, preparation, and how you use your hands.
A temporary adhesive-tab set may be suitable for an evening or a short event. Glue-based sets can last longer when they fit well and are applied correctly. Some brands advertise wear periods of up to one or two weeks, but that is not a promise that every person will get the same result.
A few habits can help:
- Avoid using your nails to open cans, scrape labels, or lift objects.
- Wear gloves when washing dishes or using cleaning products.
- Do not pull at a tip that has started lifting.
- Keep spare tips from the kit for a replacement if one comes loose.
- Follow the brand’s instructions if you need to reapply a tip.
If a nail repeatedly lifts in the same spot, check its size and placement rather than adding more adhesive without addressing the fit.
How to Remove Press-On Nails Without Damaging Your Natural Nails

Removal is where people often create the damage they blame on the press-on set. Pulling a tip off before the adhesive has loosened can take layers of the natural nail with it.
For reusable glue-based sets, some manufacturers recommend soaking in warm, soapy water until the adhesive releases. Olive & June, for example, describes a warm-water removal method and advises soaking again if the tips do not come away easily.
Use the removal method supplied by your own brand:
- Check the manufacturer’s removal instructions.
- Soak or use the recommended remover for the stated amount of time.
- Wait until the artificial nail loosens.
- Gently ease it away only when it releases.
- If it resists, stop and repeat the soaking process.
- Remove leftover adhesive gently, without scraping or force.
- Wash your hands and apply cuticle oil or moisturizer.
Do not rip, pry, or force a press-on off. If you notice persistent redness, itching, swelling, pain, or a rash around the nails, stop using the product and seek medical advice. Nail adhesives and artificial nail products can cause reactions in some people.
The American Academy of Dermatology’s guidance on artificial nail damage explains why artificial nail products and removal methods can affect natural nails. Its manicure safety advice also recommends avoiding artificial nails when you are trying to cover existing nail problems.
Common Press-On Nail Mistakes to Avoid

A few small errors can turn a good kit into a frustrating manicure.
Choosing a design before checking the size: A beautiful pattern cannot fix a tip that is too wide or narrow. Confirm the fit first.
Applying tips over damp nails: Moisture can interfere with adhesive performance. Let your nails dry fully before application.
Using too much glue: Excess adhesive can seep onto your skin and make cleanup difficult. Follow the kit’s directions instead of assuming more glue means a stronger hold.
Ignoring a lifting edge: A loose tip can catch on hair or fabric. Do not keep pulling at it or cover the problem with more product without checking the fit.
Forcing removal: If a press-on will not release, it needs more time or the correct removal product, not more force.
Frequently Asked Questions
What are the best press-on nails for beginners?
Look for a kit with plenty of sizes, clear instructions, and a shape that is easy to wear. Olive & June is worth considering for its broad sizing range, while KISS imPRESS may suit beginners who prefer an adhesive-backed application.
Are press-on nails better with glue or adhesive tabs?
Glue is generally the better choice when you want longer wear. Adhesive tabs are convenient for temporary use and easier removal. The best option depends on how long you want to keep the manicure and the instructions for your chosen kit.
Can press-on nails last two weeks?
Some brands advertise wear periods of up to two weeks, and published reviews report that some users achieve extended wear. Your results depend on nail preparation, sizing, adhesive, and daily activity. Treat advertised wear time as a guide, not a guarantee.
Do press-on nails damage natural nails?
They can contribute to damage if you force them off, scrape the nail plate, or repeatedly use products that irritate your skin. Careful application and removal reduce avoidable problems. Avoid covering nails that are already damaged or showing signs of infection.
Can you reuse press-on nails?
Some glue-based press-ons can be reused if they remain intact and the adhesive can be removed without damaging the tips. Other sets are designed for one-time use. Check the manufacturer’s instructions before trying to reuse them.
Are press-on nails suitable for short natural nails?
Yes. Short natural nails can work well with press-ons, provided the artificial tips fit the nail bed and do not extend so far that they become uncomfortable. Short round and squoval styles are practical starting points.
How do you make press-on nails look more natural?
Choose the correct size for each finger, avoid tips that sit on the skin, and select a shape that follows your natural nail. A finish that suits your style helps, but accurate sizing is usually the detail that makes the biggest visual difference.
Final Thoughts
The best press-on nails are not necessarily the most expensive or the most decorated. They are the ones that fit your nail beds, suit your routine, and can be removed without a fight.
If sizing is your usual problem, start with a kit that offers plenty of options. If you want detailed designs, compare Glamnetic and other design-focused ranges. If speed matters most, consider an adhesive-backed set.
Take time with preparation, follow the instructions for your adhesive, and be patient when removing the tips. Those choices will do more for the result than buying the most expensive box on the shelf.









