


What happens when you finally commit to a move twenty feet off the deck, and the only thing between you and the ground is a piece of foam you bought online? That moment is why the crash pad matters more than almost any other piece of bouldering gear. It is also why so many climbers get the choice wrong. They buy for the spec sheet instead of the landing zone, or they size up when they should have sized down, or they treat a pad as a magic carpet that cancels out bad spotting and worse terrain.
This guide walks through what actually separates a good outdoor pad from a bad one, where the real trade-offs sit, and how to match a pad to the way you climb. No hype, no invented lab numbers, just the practical logic that experienced boulderers use when they spend their money.
What a Crash Pad Actually Does
A bouldering pad is not a trampoline. It does not absorb a fall so much as it spreads the force of one across a wider area and over a slightly longer moment in time. That distinction matters, because it explains why a thick pad on a bad landing can still hurt you, and why a thinner pad on flat, clean ground can be perfectly safe.
Modern pads generally use layered foam. A firmer layer sits underneath to distribute impact and stop you from bottoming out, and a softer layer sits on top for comfort and to help the pad conform to uneven ground. The exact densities, layer counts, and thicknesses vary widely between models and change from one product generation to the next, so treat any specific number you read as a snapshot rather than a permanent fact.
The takeaway is simple: a pad is one part of a system. The other parts are the ground beneath it, the slope of the landing, the spotter, and your own judgment about whether the fall is worth taking.
The Two Main Formats: Hinge and Taco
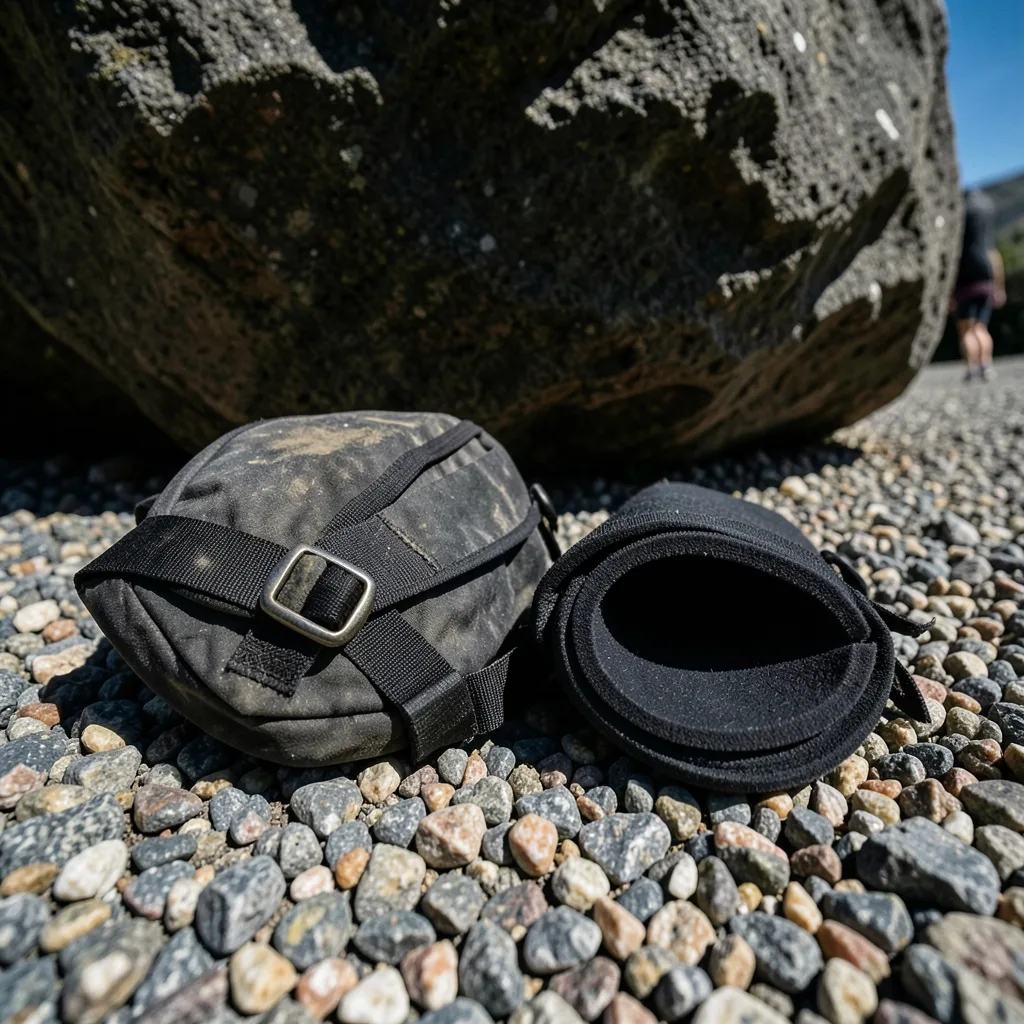
Almost every outdoor pad falls into one of two designs, and the choice between them shapes how you will use the pad more than any foam spec.
| Feature | Hinge (fold-flat) | Taco (fold-over) |
|---|---|---|
| How it folds | Two halves meet at a hinge, often with a foam flap | Folds in half like a shell, no hinge line |
| Landing surface | A hinge gap can catch a heel if poorly designed | Continuous surface, no gap |
| Carrying | Folds flatter, easier on long approaches | Bulkier, can be awkward on narrow trails |
| Coverage | Often larger when open | Often narrower but deeper |
| Best for | Long walk-ins, solo sessions, stacking | Committing landings, uneven ground, highballs |
Hinge pads win on portability. They fold into a flatter, more backpack-like shape, which makes a two-mile approach far less miserable. The trade-off is the hinge itself. A well-made hinge pad uses a foam flap or an overlapping closure so the seam does not become a trap for an ankle. A cheap one does not, and that seam is exactly where a foot lands when you ping off a sloping hold.
Taco pads eliminate the seam entirely. The continuous foam means there is no weak point in the middle of the landing surface, and the curved edges tend to hug uneven ground better. The cost is bulk. A taco pad is a wide, floppy object to carry, and on a narrow approach trail it will remind you of that constantly.
There is no universal winner. If the approach is long and the landings are clean, a hinge pad is the smarter buy. If the landings are awkward and the walk is short, a taco is worth the inconvenience.
Thickness, Coverage, and the Numbers That Matter
Outdoor pads have generally gotten thicker over the past two decades, and many current models sit somewhere in the range of roughly 10 to 13 centimeters, or about 4 to 5 inches. That range is a useful starting point, not a rule. No standards body fixes a “correct” thickness for bouldering pads, so a number on a spec sheet tells you less than you might hope.
What matters more is the combination of thickness and area. A thick pad with a small footprint protects a small zone very well. A thinner pad with a large footprint protects a wide zone adequately. For most outdoor bouldering, coverage beats raw thickness, because the most common failure is not bottoming out through the foam but landing just off the edge of the pad entirely.
Two practical rules of thumb hold up well in the field:
- The pad should cover the landing zone plus a margin on every side, beyond the spot directly beneath the climber.
- On highballs or anything with a committing topout, one pad is rarely enough. Stack two, or place one where you will land and one where you might tumble.
A common mistake is buying the biggest single pad available and assuming it replaces a second pad. It does not. Two medium pads placed thoughtfully beat one enormous pad placed optimistically, because you can position them around the actual fall zone rather than centering everything on a guess.
Landing Zone Assessment Beats Pad Choice
Here is the uncomfortable truth that experienced boulderers learn early: the ground under the pad matters more than the pad. A premium pad on a slope littered with rocks and tree roots is a worse setup than a modest pad on flat, clean sand.
Before you unroll anything, look at the landing. Is it sloped? If so, the pad will slide or sit at an angle, and your ankle will find the low side. Are there rocks, roots, or holes beneath where the foam will sit? A pad draped over a protruding rock is a pad that transfers that rock straight into your back. Is the ground going to be wet, icy, or loose? (The row)
Practical fixes that actually work:
- Fill hollows with branches, packs, or a second pad before laying foam over them.
- On slopes, orient the pad so its long axis runs across the fall line, and tuck the uphill edge under vegetation or a rock if you can.
- Carry a small tarp or use the pad’s own base to keep moisture from wicking into the foam.
- Clear sharp sticks and stones from the landing before you place the pad, not after.
This is also where the spotter earns their keep. A spotter’s job is to guide a falling climber’s upper body onto the pad and away from hazards, not to catch them. A pad plus a competent spotter is a genuinely different safety equation than a pad alone.
Foam, Durability, and What Kills a Pad
Foam degrades. That is not a defect, it is physics. Ultraviolet light, repeated compression cycles, and moisture all take a toll, and a pad that lived in a hot car for three summers will feel very different from one stored indoors.
The practical implications are worth internalizing:
- Store pads flat or loosely folded, not compressed under heavy gear.
- Keep them out of direct sun when not in use, and out of hot vehicles.
- Dry them thoroughly after wet sessions; trapped moisture breaks foam down and grows things you do not want in your car.
- Expect the top comfort layer to soften first. When a pad starts bottoming out on landings it used to handle, it has retired from primary duty.
Manufacturer guidance on lifespan varies, and there is no standardized test for pad longevity, so treat any claimed lifespan with appropriate skepticism. A pad used weekly on abrasive granite will not last as long as one used monthly on friendly sandstone.
Carry Systems: The Underrated Spec
Carry comfort is not a safety feature, but it decides whether you actually use the pad. A pad that is miserable to carry stays in the car, and a pad in the car protects nobody.
Look for wide, padded shoulder straps, a sternum strap that keeps the load stable, and a waist belt that transfers weight to your hips on longer approaches. Backpack-conversion systems, where the pad opens into a roll-top bag, are genuinely useful for solo sessions because they let you carry shoes, chalk, and water inside the folded pad rather than in a separate pack.
Try before you buy if you can. Fold the pad, put it on, and walk around the shop. A pad that feels fine standing still can become a shoulder-slicing ordeal after a mile of uphill.
Matching the Pad to Your Climbing
The best pad is the one that fits your actual sessions, not the one with the best marketing. (2b hair)
For solo sessions on short problems: a single mid-size hinge pad with a good carry system and a small backpack conversion is the sweet spot. Light, easy to move between problems, enough coverage for lowballs.
For highballs and committing lines: two pads, or one large taco plus a smaller “spotter pad” for the edges. Coverage and a continuous surface matter more than portability.
For long approaches: prioritize the hinge format and a comfortable harness. You will forgive a slightly smaller landing zone; you will not forgive a bruised shoulder.
For uneven or rocky terrain: a taco’s continuous foam and conforming edges earn their bulk. Pair it with careful ground prep.
If you climb on varied rock types, it helps to understand how different textures and features change what a landing looks like. Sloping granite slabs, for instance, demand different pad placement than vertical gritstone. Climbers who spend time on textured, springy rock often develop a feel for landings that transfers across styles, much like the way hair typing guides product choices in entirely unrelated fields. (4c hair)
Common Mistakes That Undermine a Good Pad
Even a well-chosen pad gets wasted by predictable errors. Watch for these:
- Placing the pad directly under the climber instead of under the fall zone, which is often slightly away from the wall.
- Leaving a hinge gap exposed by not deploying the foam flap.
- Stacking pads loosely so they slide apart on impact.
- Ignoring the edges, where a foot or hip can slip off the foam onto bare ground.
- Assuming the pad makes a bad landing safe rather than fixing the landing first.
- Skipping the spotter because the pad “looks big enough.”
Each of these is cheap to fix and expensive to learn the hard way.
Conclusion
The best crash pad for bouldering outdoors is not the thickest, the biggest, or the most expensive. It is the one that matches your landings, your approaches, and your honesty about the falls you take. Start with the ground: clear it, assess the slope, and fix what you can before you unroll anything. Then choose a format, hinge for portability or taco for continuity, and prioritize coverage over raw thickness. Add a second pad before you add a bigger one. Keep the foam dry, out of the sun, and out of hot cars. And never let the pad talk you out of a spotter or into a fall you would not otherwise take.
Buy for the sessions you actually have, carry it comfortably, and treat it as one part of a system rather than a guarantee. That is what separates climbers who get years out of their gear from those who keep replacing it.
Frequently Asked Questions
How thick should a crash pad be for outdoor bouldering?
Most current outdoor pads fall in the range of roughly 10 to 13 centimeters, or about 4 to 5 inches, but no standard fixes a correct thickness. Coverage and placement usually matter more than raw thickness, because landing just off the edge of a pad is a more common problem than compressing all the way through it.
Is a hinge pad or a taco pad better?
It depends on your priorities. Hinge pads fold flatter and are much easier to carry on long approaches, but a poorly designed hinge can create a gap that catches a foot. Taco pads offer a continuous landing surface with no seam and conform better to uneven ground, but they are bulkier to carry. Choose hinge for walk-ins, taco for awkward landings.
Can one large pad replace two smaller ones?
Usually not. Two medium pads placed around the actual fall zone generally protect better than one oversized pad centered on a guess, because you can cover the edges and the tumble zone. On highballs and committing topouts, a second pad is one of the highest-value additions you can make.
How long does a crash pad last?
There is no standardized lifespan, and manufacturer guidance varies. Foam degrades through ultraviolet exposure, repeated compression, and moisture, so a pad stored in a hot car or left in the sun will break down faster. A practical signal is when a pad starts bottoming out on landings it used to handle comfortably, at which point it should retire from primary duty.
Does a crash pad make any landing safe?
No. The ground beneath the pad matters more than the pad itself. Slopes, protruding rocks, roots, and holes can all transfer force through the foam, so clearing and preparing the landing zone comes first. A pad plus a competent spotter is a genuinely different safety setup than a pad alone, and neither replaces judgment about whether to commit to a move.
What is the most common mistake when placing a pad?
Placing it directly beneath the climber rather than beneath the actual fall zone, which is often slightly away from the wall. Other frequent errors include leaving a hinge flap undeployed, stacking pads so they slide apart on impact, and ignoring the edges where a foot or hip can slip off onto bare ground.









