


What if the best part of an iced coffee isn’t the coffee at all, but the thick, velvety cap floating on top? That cap is cold foam, and it has quietly become one of the most copied café tricks of the past decade. The good news: you do not need a commercial blender, a barista certificate, or a $7 drive-thru habit to get it. You need cold milk, a little air, and about sixty seconds of elbow grease.
This guide walks through what cold foam actually is, why some milks foam beautifully while others collapse into sad bubbles, and the three home methods that reliably work. It also covers the mistakes that quietly ruin batch after batch, plus a few upgrades worth trying once the basics click.
What Cold Foam Actually Is
Cold foam is milk or a milk alternative that has been aerated while cold into a dense, pourable microfoam. It sits on top of iced drinks rather than dissolving into them, and it is fundamentally different from the steamed foam on a cappuccino. Steamed foam relies on heat to denature milk proteins and build structure. Cold foam skips the heat entirely and builds structure through mechanical agitation instead.
Starbucks is the reason most people know the term. The chain added Cold Foam to its United States menu in 2018, initially as a topping for cold brew, and the format spread across the coffee world fast. The company’s standard nonfat version is made by aerating nonfat milk in a dedicated blender pitcher rather than by steaming. That detail matters, because it explains why home versions made with a whisk or a jar can get surprisingly close: the mechanism is the same, just less powerful.
One thing worth knowing up front: there is no formal industry standard defining cold foam texture or method. Unlike espresso extraction, which has volumes of published parameters, cold foam is a technique without a rulebook. Most timings you see online are rules of thumb, not laboratory constants. That is liberating, honestly. It means you can tune the method to your own kitchen instead of chasing someone else’s exact numbers.
Why Some Milks Foam and Others Fail
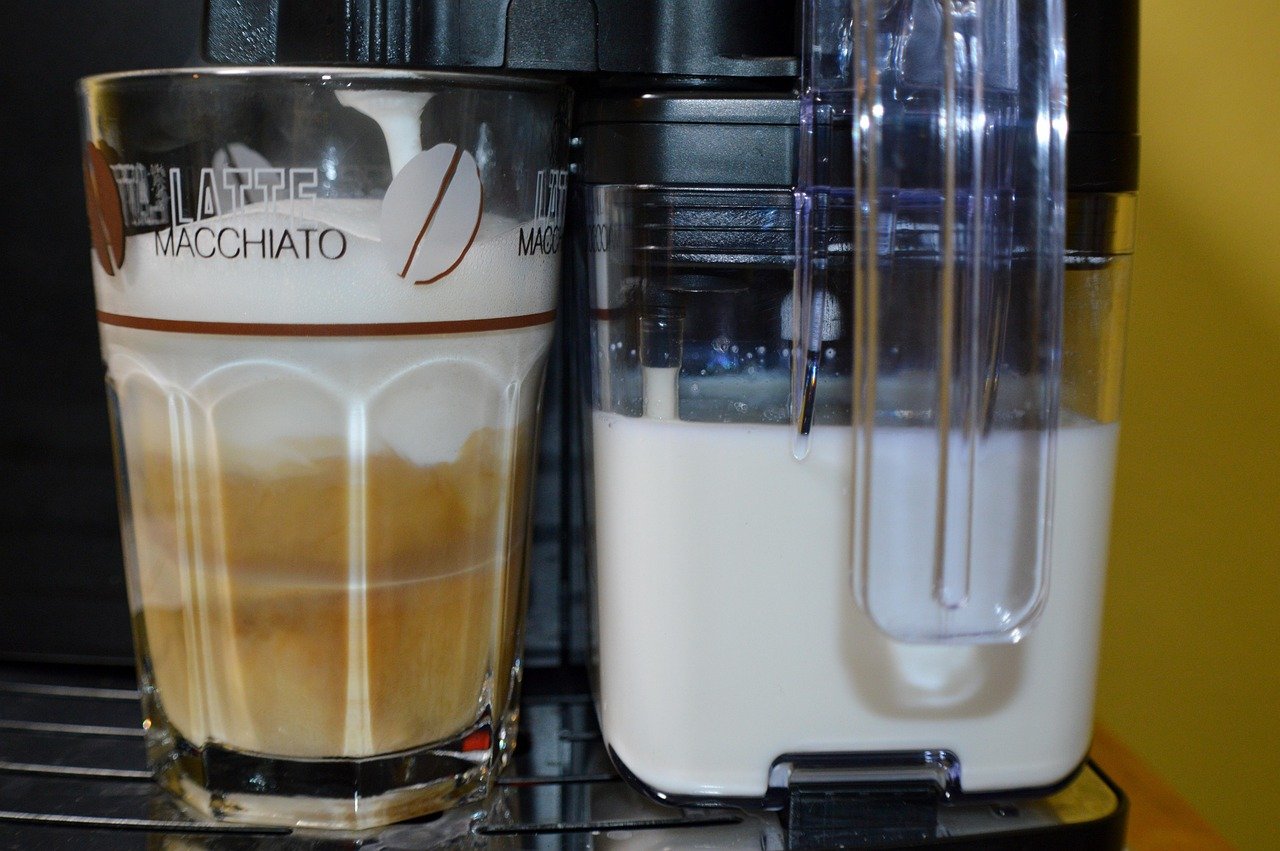
Before touching equipment, understand the ingredient. Foam is a structure of air bubbles held together by protein, and fat gets in the way of that structure. Higher-protein, lower-fat milks generally produce stiffer, more stable foam. Whole milk gives you a richer, creamier, but softer cap that collapses sooner.
| Milk type | Foam stiffness | Foam stability | Flavor impact |
|---|---|---|---|
| Nonfat | High | High | Clean, light |
| 1% or 2% | Medium-high | Medium-high | Balanced |
| Whole milk | Medium | Medium | Rich, creamy |
| Barista oat milk | Medium-high | Medium-high | Oaty, slightly sweet |
| Barista soy milk | High | High | Neutral, slightly beany |
| Regular almond milk | Low | Low | Nutty, thin foam |
Plant milks are the wild card. Barista-formulated oat and soy milks are explicitly designed for foaming, with added fats and stabilizers that hold air well. Standard almond milk, by contrast, often foams poorly and deflates within a minute. If a batch fails with almond milk, the milk is usually the culprit, not your technique.
Temperature is the other lever. Cold foam is made from refrigerated milk, full stop. Warming the milk defeats the entire purpose and changes the foam structure in ways you cannot undo. Some methods go further and chill the pitcher or the whisk attachment beforehand. The mechanism is plausible, and plenty of baristas swear by it, but treat pre-chilling as a helpful habit rather than a proven requirement.
Method 1: The French Press
The French press is the most forgiving home tool for cold foam, and it is probably already in your cabinet.
- Pour cold milk into the French press, filling it no more than one-third of the way. Leave headroom for the foam to expand.
- Place the lid on and move the plunger up and down vigorously, keeping the mesh filter submerged in the milk.
- Plunge for roughly 30 to 60 seconds, until the volume roughly doubles and the surface looks thick and glossy.
- Stop while the foam still looks wet and pourable. Over-plunging creates dry, stiff bubbles that sit like packing material.
- Pour slowly over the back of a spoon onto your iced drink.
The mesh filter is what makes this work: it forces the milk through many small holes, breaking large bubbles into fine ones. This is pure mechanical aeration, no chemistry tricks involved. The main mistake people make is under-plunging. Twenty lazy pumps will not do it. You want visible, dramatic expansion.
Method 2: The Handheld Frother
A battery-powered milk frother is the fastest route to decent cold foam, and the technique is almost embarrassingly simple. (The row)
- Fill a tall glass or jar no more than halfway with cold milk.
- Submerge the whisk head just below the surface, then turn it on.
- Tilt the frother slightly and move it in small circles, keeping the whisk near the top of the liquid so it pulls in air.
- Run it for 20 to 40 seconds, until the foam rises and thickens.
- Tap the glass on the counter a couple of times to pop large bubbles, then pour.
The most common error here is dunking the whisk too deep. If the head sits at the bottom of the glass, you are stirring the milk, not aerating it. Air incorporation happens at the surface. Keep the whisk high and you will see the difference immediately.
Results from a handheld frother are generally less stable than commercial blender foam, so drink it soon after making it. That is not a flaw in your technique; it is a limitation of the tool.
Method 3: The Jar Shake
No equipment at all? A sealed jar works, and it doubles as a workout.
- Fill a mason jar about one-third full with cold milk.
- Seal the lid tightly. This is not the moment for a loose cap.
- Shake hard for about 30 seconds. Not a gentle wobble. A real shake.
- Open carefully and pour the foam off the top, using a spoon to hold back the liquid milk if needed.
The jar method produces a coarser foam than the other two, with bigger bubbles that fade faster. It is the right choice for camping, hotel rooms, or the morning you discover the frother battery is dead. If you want to improve the texture, pour the shaken milk through a fine-mesh strainer to knock out the largest bubbles.
The Sweet Cream Upgrade
Once plain cold foam feels routine, the next step is sweet cream cold foam, the vanilla-kissed version that turned a simple topping into a dessert-adjacent ritual. The formula is simple: combine heavy cream, a splash of milk, and vanilla syrup, then foam it using any of the methods above.
The added fat makes a richer, less stiff foam. That trade-off is the whole point. You lose some height and gain a texture closer to melted ice cream. Exact ratios vary widely between published recipes and none is standardized, so start with roughly two parts heavy cream to one part milk, add syrup to taste, and adjust from there. Too much cream and the foam turns into whipped cream; too little and you have basically made plain cold foam with a hint of vanilla.
A practical note: sweet cream cold foam benefits from starting very cold. Heavy cream at room temperature whips sluggishly and can turn greasy if overworked. Keep everything in the fridge until the moment you need it.
Mistakes That Ruin a Batch
Most failed cold foam comes down to a short list of fixable problems.
- Warm milk. The single biggest cause of flat foam. Use milk straight from the fridge.
- Too little air. Whether you plunge, whisk, or shake, you need vigorous movement near the surface. Timid agitation produces flavored milk, not foam.
- The wrong milk. Regular almond milk and some low-protein plant milks simply do not hold air well. Switch to a barista-style oat or soy, or use dairy.
- Over-frothing. More is not better. Past a certain point the bubbles grow large and dry, and the foam turns stiff and unpleasant.
- Letting it sit. Homemade foam commonly holds for only a few minutes before collapsing. Make it last, and pour it immediately.
- Pouring too fast. A hard pour punches through the foam and mixes it into the drink. Pour slowly over the back of a spoon.
How to Serve It
Cold foam shines on drinks that need contrast: cold brew, iced americano, iced lattes, and even iced matcha. The play is texture and temperature, so the drink underneath should be genuinely cold and preferably unsweetened or lightly sweetened. A very sweet base plus sweet foam turns cloying fast.
Pour the foam slowly down the side of the glass or over the back of a spoon held just above the surface. You want a distinct layer, not a swirl. If you are feeling fancy, dust the top with cinnamon, cocoa, or a little citrus zest. If you are working with a textured hair type and reading this for some unrelated reason, the search results for 4c hair are a different rabbit hole entirely; here, the only texture that matters is in the glass. (2b hair)
For anyone layering flavors, think of cold foam like a garnish with weight. It should complement the drink, not dominate it. A light vanilla foam over a strong cold brew is a classic for a reason. A heavy sweet cream foam over an already creamy latte is usually too much.
Scaling Up and Storing
Cold foam is a make-it-now product. It does not keep. If you foam a batch and leave it in the fridge, you will return to a thin layer of bubbles and a lot of plain milk. Make only what you plan to drink.
That said, you can prep the liquid base ahead of time. Mix your milk and syrup in a jar and keep it chilled overnight, then foam individual servings as needed. This is the move for anyone hosting brunch: set out the pre-mixed base, a frother, and a few glasses, and let guests foam their own.
For larger gatherings, a French press scaled to a bigger carafe works well, though you may need to plunge in two rounds to get enough volume. Just remember that each round should be poured within minutes.
Conclusion
Cold foam is one of those rare café techniques that translates almost perfectly to a home kitchen, because the physics are simple: cold milk, lots of air, and a mesh or whisk to break big bubbles into small ones. The French press gives the best texture for the least money. A handheld frother wins on speed. A jar wins on portability. And the milk you choose matters as much as the method, which is why barista-style oat and nonfat dairy outperform regular almond milk almost every time.
Start with plain nonfat or 2% milk, plunge or whisk until the volume roughly doubles, and pour slowly over a cold drink. Once that works reliably, branch into sweet cream, experiment with barista oat, and stop worrying about exact timings. There is no official standard to hit. There is only the foam in your glass, and whether you want another one.
Frequently Asked Questions
What is cold foam made of?
Cold foam is made from cold milk or a milk alternative, sometimes with added syrup or cream for flavor. The base is always refrigerated liquid, never heated. Dairy milks and barista-formulated plant milks work best because their protein content supports stable bubbles.
Can I make cold foam without any special equipment?
Yes. A sealed mason jar shaken hard for about 30 seconds produces usable foam with zero equipment beyond the jar itself. The texture is coarser than French press or frother foam and it fades faster, but it works well for a single drink. A fine-mesh strainer can improve the texture by removing the largest bubbles.
Why does my cold foam disappear so fast?
Homemade cold foam typically holds for only a few minutes before collapsing, especially foam made with a handheld frother or a jar. Low-protein milks, warm milk, and over-frothing all speed up the collapse. Use very cold, high-protein milk and pour immediately for the best results.
Is whole milk or nonfat better for cold foam?
It depends on what you want. Nonfat milk produces stiffer, more stable foam because its lower fat content allows more stable air incorporation. Whole milk gives a richer, creamier foam that is softer and collapses sooner. For a thick cap that lasts, nonfat or 1% to 2% is the safer bet.
What is sweet cream cold foam?
Sweet cream cold foam adds heavy cream, a splash of milk, and vanilla syrup to the base before foaming. The extra fat creates a richer, less stiff foam with a dessert-like texture. Ratios vary between recipes, so start with about two parts cream to one part milk and adjust to taste.
How long should I plunge a French press for cold foam?
Roughly 30 to 60 seconds of vigorous plunging, until the milk volume approximately doubles. Keep the mesh filter submerged and move the plunger up and down with real force. Stop while the foam still looks wet and pourable, since over-plunging creates dry, stiff bubbles.









