
What if the streaks on your windows aren’t caused by cheap cleaner or lazy scrubbing, but by the order in which you do things? Most people spray, wipe in circles, and then wonder why the afternoon sun turns every pane into a map of smudges. The fix isn’t more effort. It’s a different sequence, a couple of cheap tools, and a little patience about timing.
This guide walks through the method professional window cleaners use, why it beats the paper-towel routine, and where common advice goes wrong. It also covers tinted glass, hard water, exterior safety, and the mistakes that quietly ruin a good cleaning job.
Why Most DIY Window Cleaning Fails
The typical home routine looks like this: glass cleaner sprayed directly on the pane, a paper towel or old rag, vigorous circular wiping, done. It feels productive. It almost always leaves residue.
Three things go wrong at once. First, paper towels shed lint and drag dirt around instead of lifting it. Second, circular wiping leaves a film of dirty solution that dries in swirls. Third, spraying cleaner straight onto glass means overspray runs down frames and pools on sills, and you never control how much product hits the pane.
There’s also a timing problem. Cleaning glass in direct sunlight or on a hot day causes the solution to dry before it can be wiped away. Rapid drying is one of the most reliable ways to create streaks, and on very hot glass it can bake residue onto the surface. Manufacturer care guidance for glass and window film repeats this warning for a reason.
The professional approach flips the sequence: soak first, agitate, then remove everything in one clean pass with a squeegee. Water does the lifting. The blade does the removal. Nothing is left behind to dry into a haze.
The Squeegee Method, Step by Step
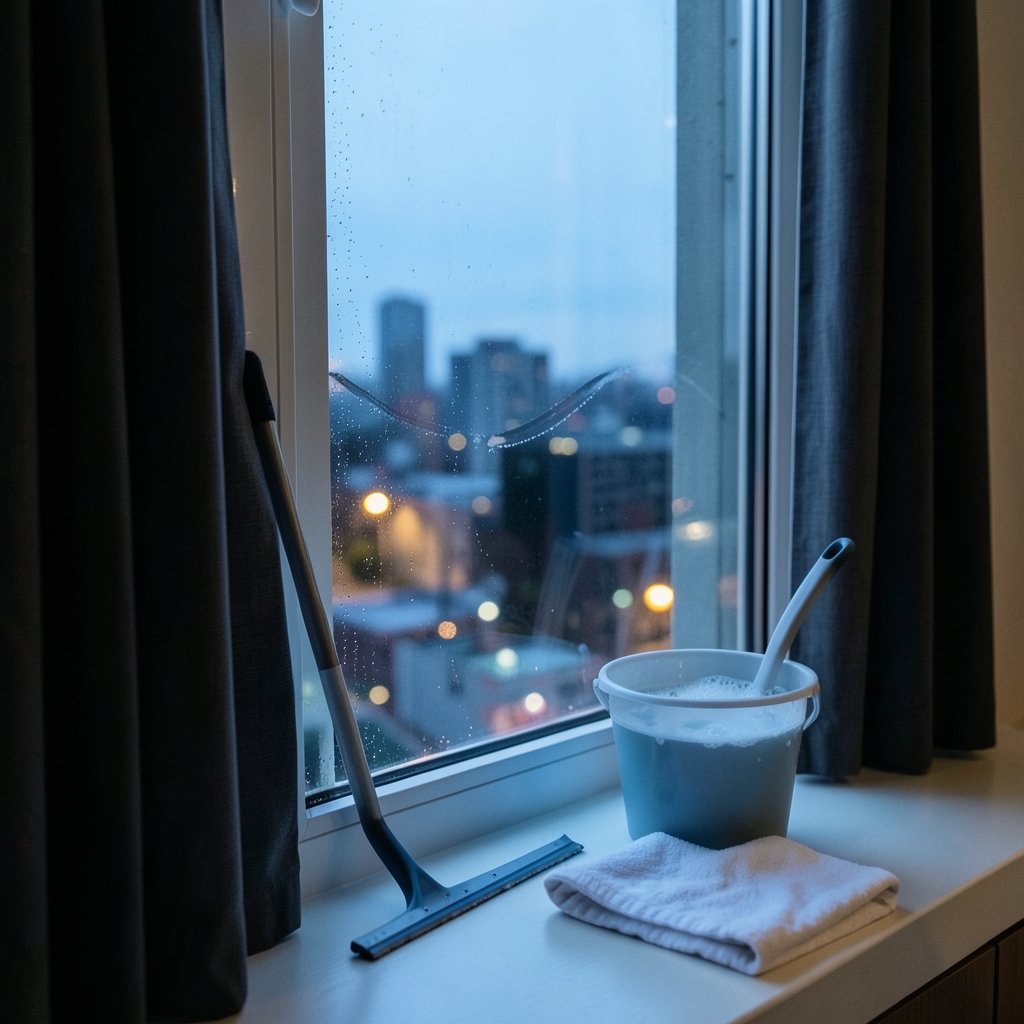
This is the core method taught in professional window-cleaning training, and it’s the one worth learning properly. It works on interior and exterior glass, and it’s dramatically faster than wiping once you’ve practiced a few panes.
- Work when the glass is cool. Early morning, late afternoon, or an overcast day. Shade is your friend. If a pane is hot to the touch, wait.
- Dust and brush first. Dry dust, pollen, and cobwebs should come off before anything gets wet. A dry microfiber cloth or soft brush handles this. Skipping it turns dust into mud you then smear around.
- Mix a simple solution. A few drops of dish soap in a bucket of water is the standard DIY mix. The usual guidance is a few drops per bucket, not a generous squeeze. Too much soap leaves a film that streaks no matter how well you squeegee.
- Apply plenty of water. Use a sponge or a strip applicator to wet the whole pane generously, working top to bottom. Wet edges and frames too, so dirt loosens rather than getting pushed around.
- Scrub the edges and corners. A detail cloth or scrubber along the frame line lifts the grime that a squeegee blade can’t reach. This is where most streaks originate.
- Pull the squeegee in overlapping strokes. Start at the top. Pull horizontally across the pane, then overlap the next stroke by about an inch. Wipe the blade dry with a cloth between every pass. A wet blade drags dirty water back onto clean glass.
- Detail the edges immediately. Squeegee strokes leave a wet line at the frame. Run a dry microfiber cloth along the edges and corners right away, before that water dries.
- Check against the light at an angle. Straight-on viewing hides streaks. Look across the glass at a low angle and fix anything you spot while the pane is still slightly damp.
The overlap matters more than people expect. Gaps between strokes leave vertical wet lines that dry into stripes. Slow, deliberate, overlapping passes beat fast, careless ones every time.
Tools That Earn Their Place
You don’t need a van full of equipment. A short list covers almost everything a home needs.
| Tool | What it does | Common mistake |
|---|---|---|
| Squeegee (quality blade) | Removes water in one clean pass | Using a worn, nicked blade that leaves lines |
| Strip applicator or large sponge | Applies water evenly and generously | Dampening instead of soaking the glass |
| Microfiber cloths | Lint-free detailing and drying edges | Reusing a dirty cloth that redistributes grime |
| Bucket with dish soap | Carries the cleaning solution | Adding too much soap and leaving film |
| Detail cloth or scrubber | Cleans frames, corners, edges | Skipping edges, which then streak |
| Dry brush | Removes dust before wetting | Wetting dust and turning it into mud |
Microfiber is the quiet hero here. It’s widely recommended over paper towels for lint-free finishing because the fibers grab and hold dirt rather than pushing it around. Keep two or three on hand: one for edges, one for frames, one dry for a final pass. Wash them separately from towels that carry fabric softener, which can leave a film of its own.
On the squeegee itself, blade condition is everything. A nicked or hardened rubber blade will leave thin lines of water on every stroke, and no amount of technique fixes it. Replace blades when they start skipping. If you’re already the type to fuss over blade quality, the same logic applies to grooming tools that need to cut cleanly rather than tug, as this guide to buzz cut trimmers that cut clean instead of hot points out. Sharp, clean edges simply behave better.
Water Quality and the Streak Problem
Here’s the detail that separates a good result from a flawless one: what’s in the water.
Tap water carries dissolved minerals, and when it dries on glass those minerals stay behind as spots and haze. Professionals often use purified or deionized water, sometimes through water-fed pole systems, precisely so the glass dries without mineral spotting. That’s trade practice rather than a formal standard, but the logic is sound: if the water leaves nothing behind, the glass dries clear.
At home, you have options. A final rinse with distilled water is the simplest upgrade, especially on exterior glass. If you live in a hard-water area, this single step can make the difference between “clean” and “actually clear.” Filtered water from a pitcher works for small jobs.
The same principle applies to how you handle a finished surface: remove the residue, don’t just move it around. It’s a bit like choosing an air-popped snack over an oil-fried one because the lighter method leaves less behind. Less residue, cleaner result.
Vinegar, Ammonia, and What Not to Use
DIY advice splits into two camps: vinegar-and-water and ammonia-based cleaners. Both work on plain glass, and both have limits worth knowing.
Vinegar and water is a common alternative to ammonia. It cuts through light films and dries fairly clear. The catch is that acetic acid can be aggressive on some natural stone and metal frames, so it should be kept off those surfaces. On aluminum frames, test a small spot first.
Ammonia-based cleaners are effective on glass, but they should not be used on tinted windows or window film. Film manufacturers advise against ammonia and abrasive cleaners because they can damage the film. If your windows have aftermarket tint, stick to plain soap and water or a product labeled safe for film.
Dish soap is the everyday workhorse. A few drops per bucket is the usual guidance. Too much and you’re back to film and streaks.
One more caution: abrasive powders and scouring pads scratch glass permanently. There’s no polishing that out. If a pane has stubborn residue, soak it longer rather than scrubbing harder.
Hard Water Spots and Stubborn Residue
Mineral deposits and hard water spots don’t respond to ordinary soap. They need a little chemistry and a lot of patience.
For light mineral haze, a diluted vinegar solution left on the glass for a minute or two, then squeegeed off, often does the job. For heavier deposits, a dedicated hard-water remover formulated for glass is the safer route than aggressive scrubbing. Always test in a corner.
The key principle is dwell time. Soaking softens deposits so the blade can lift them. Scrubbing hard on dry glass does the opposite: it grinds minerals into the surface. If a spot won’t budge after two soak-and-squeegee cycles, it may be etched into the glass, and no cleaner will remove it.
Paint, adhesive, and sticker residue need a different approach: a plastic scraper used wet, with plenty of solution as lubrication. Never dry-scrape glass. A razor blade held at a shallow angle works on plain glass but should stay far away from tinted film.
Cleaning Tinted Windows and Film Safely
Tinted glass is its own category, and the rules change.
Ammonia is out. Abrasives are out. Harsh solvents are out. Film manufacturers recommend mild soap and water with a soft cloth, and gentle pressure. The film’s scratch-resistant coating is thin, and once it’s damaged the mark is permanent.
The method stays the same otherwise: soak, gently agitate with a soft cloth rather than a scrubber, and squeegee with light pressure. Skip the detail scrubber on film. Keep the blade clean and don’t let it dig into the edge where the film meets the frame.
If you’re unsure whether a window is filmed, check a corner. Film edges are usually visible as a faint line a few millimeters in from the frame.
Exterior Windows, Ladders, and Safety
Exterior glass above ground level is where DIY enthusiasm meets real risk. Fall protection is a regulated matter, and ladder work is the leading hazard for home exterior cleaning.
The practical rules are simple and non-negotiable. Keep ladders on firm, level ground. Maintain three points of contact. Never overreach sideways; move the ladder instead. Don’t clean exterior windows in wind or rain. And if a window is high enough that reaching it feels precarious, hire someone. Professional cleaners carry insurance and fall-protection equipment for exactly this reason.
For ground-floor exterior glass, the method is identical to indoors. The only addition is a garden hose for a pre-rinse, which knocks off loose dirt before you start. A final rinse with clean water, squeegeed top to bottom, finishes the job.
Common Mistakes That Undo a Good Job
Even people who know the method slip on these. Watch for them.
- Cleaning in direct sun. The solution dries before you can remove it. Work in shade or wait.
- Too much soap. More suds do not mean more cleaning power. A few drops per bucket is plenty.
- Skipping the dry dust pass. Dust plus water equals mud, and mud smears.
- A wet squeegee blade. Wipe it dry between every stroke, or you’re painting dirty water back on.
- Neglecting edges and corners. This is where streaks live.
- Reusing a grimy cloth. A dirty microfiber just moves dirt around. Swap it out.
- Spraying cleaner on frames and sills. Overspray runs, pools, and leaves marks. Apply solution to the glass, not the surroundings.
- Viewing straight on. Check at an angle, against the light, to catch what you’d otherwise miss.
There’s a certain satisfaction in a job done in the right order, and it shows up in small places. The same instinct that makes someone notice a perfectly clear pane also makes them appreciate a well-told clean joke for kids or a neatly converted measurement, like knowing how to turn pounds into stone the British way. Details matter, and the details are where streaks hide.
How Often Should Windows Be Cleaned?
Twice a year is the usual baseline for most homes: once in spring, once in autumn. That schedule keeps glass from accumulating enough film to need heavy treatment.
Some situations call for more. Homes near busy roads, construction, or farmland collect dust faster. Coastal homes deal with salt spray. Households with pets and small children often find nose prints and hand marks on interior glass that need spot cleaning between full sessions.
Exterior glass facing weather usually needs the most attention. Interior glass mostly collects fingerprints and cooking film, which a quick microfiber pass handles. A full squeegee session every few months keeps both sides in good shape.
Conclusion
The best way to clean windows isn’t a miracle product. It’s a sequence: dry dust first, soak generously with a mild soap solution, scrub the edges, then pull a clean, dry squeegee blade in overlapping strokes and detail the frame lines before they dry. Add cool glass, decent microfiber, and a final rinse with clean water, and streaks stop being a mystery.
Most failures trace back to one of three causes: too much soap, too much sun, or a wet blade. Fix those and the rest falls into place. The method takes an afternoon to learn and about half the time of the old spray-and-wipe routine once it clicks. Start with one pane, check it against the light, and adjust.
How do professionals get windows streak-free?
They control three variables: the glass is cool, the solution is mostly water with very little soap, and the squeegee blade is wiped dry between every stroke. They also detail the edges immediately, before the wet line at the frame can dry. Purified or deionized water is often used for the final rinse so nothing is left behind when the glass dries.
Is vinegar or dish soap better for cleaning windows?
Both work on plain glass, and the choice depends on the job. Dish soap in water is the everyday option and handles general grime well with just a few drops per bucket. Vinegar and water cuts light mineral film and dries fairly clear, but acetic acid can be aggressive on some natural stone and metal frames, so it should be kept off those surfaces. Neither should be used on tinted film.
Can I use ammonia cleaner on tinted windows?
No. Film manufacturers advise against ammonia and abrasive cleaners because they can damage window film. Tinted glass should be cleaned with mild soap and water, a soft cloth, and gentle pressure. Once the film’s coating is scratched or chemically damaged, the mark is permanent.
Why do my windows look streaky right after cleaning?
The most common causes are cleaning in direct sunlight or on a hot day, using too much soap, and failing to wipe the squeegee blade dry between strokes. Rapid drying traps residue in visible lines. Gaps between squeegee strokes also leave wet stripes that dry into streaks, so overlap each pass by about an inch.
What is the best way to remove hard water spots from glass?
Soak the area with a diluted vinegar solution or a dedicated hard-water remover formulated for glass, let it dwell for a minute or two, then squeegee it off. Repeat if needed. The key is dwell time rather than scrubbing pressure, since dry scrubbing grinds minerals into the surface. If spots remain after two cycles, they may be etched into the glass permanently.
How often should home windows be cleaned?
Twice a year suits most homes: once in spring and once in autumn. Homes near busy roads, construction, or farmland, and coastal homes dealing with salt spray, may need more frequent cleaning. Interior glass usually just needs spot cleaning for fingerprints and cooking film between full sessions.