

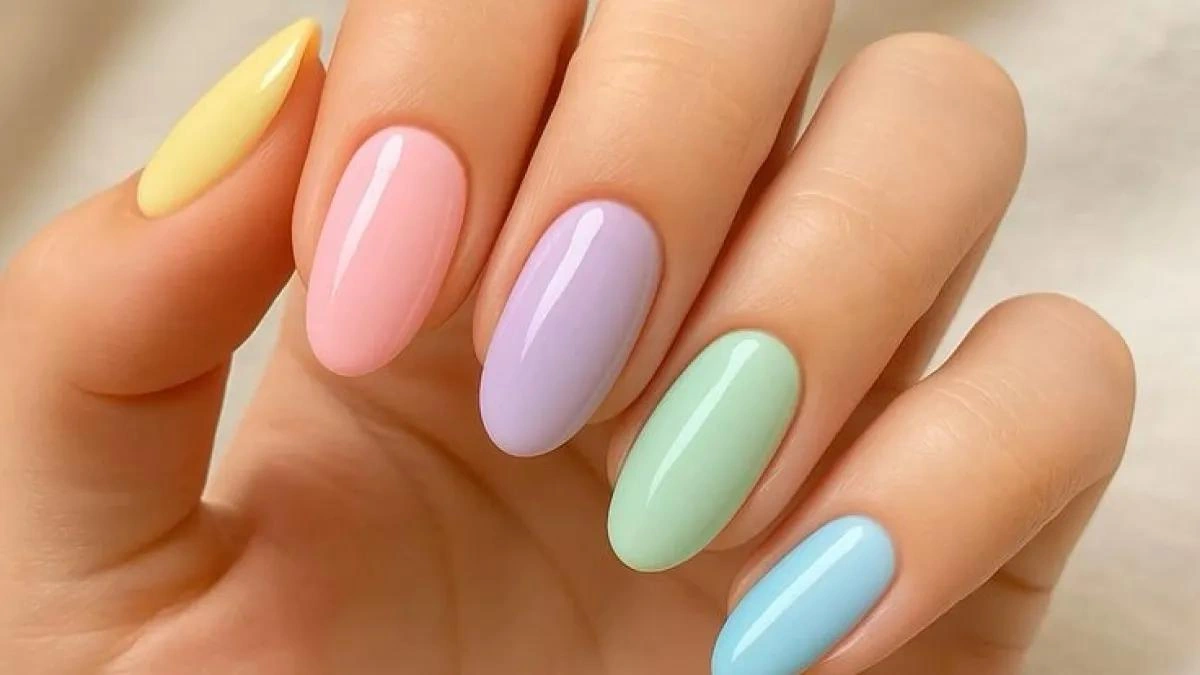
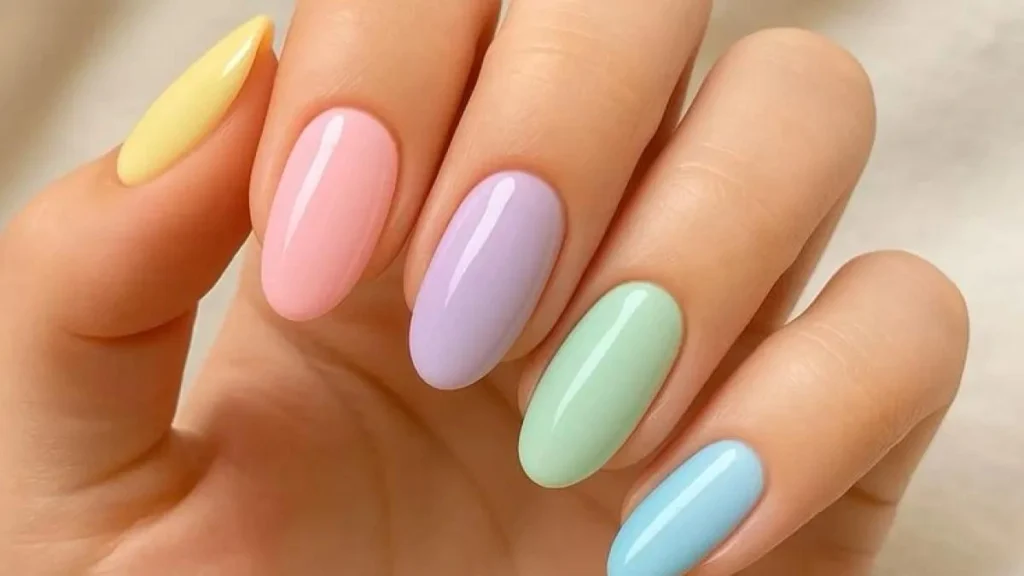
Easter is a good time to try lighter nail colors and playful designs. Soft pastels, tiny flowers, delicate patterns, and small bunny details can give your manicure a seasonal look without making it feel too decorative.
But Easter nails do not have to include a bunny or an egg on every finger. Sometimes, a simple pastel manicure with one small detail looks more balanced and is easier to wear after the holiday.
The trick is to choose your color palette first. Butter yellow, mint, lilac, baby pink, sky blue, and cream work well together when you use them carefully. You can wear one shade across all your nails, give each nail a different pastel color, or add a small design to one or two fingers.
This guide covers eight Easter nail designs for brunch, family gatherings, spring celebrations, and everyday wear. You will also find color combinations, short-nail ideas, salon booking advice, and simple tips for creating these looks at home.
Quick Answer: What Are the Best Easter Nail Ideas?
The best Easter nail ideas use soft spring colors and small seasonal details to create a fresh, festive manicure. Popular choices include mismatched pastel nails, pastel French tips, jelly finishes, pastel chrome, tiny Easter egg dots, floral accents, bunny silhouettes, and gingham patterns. Butter yellow, mint, lilac, baby pink, sky blue, and cream are versatile colors for these designs. For a simple look, choose one pastel shade with a small accent. For something more playful, combine two or three coordinated colors while keeping the nail art minimal.
Key Takeaways
- Eight Easter nail designs include mismatched pastels, French tips, jelly finishes, chrome, egg dots, flowers, bunny silhouettes, and gingham patterns.
- Six versatile colors cover most looks: butter yellow, mint, lilac, baby pink, sky blue, and cream.
- Use cream or sheer pink to balance different pastel shades.
- Short nails work well with thin French tips, tiny dots, and simple accent art.
- Keep one main design and limit extra details to avoid a crowded manicure.
- Book ahead if you want a specific salon appointment during the holiday weekend.
- Choose gel or regular polish based on your preferred wear and removal routine.
8 Easter Nail Designs to Try This Spring
1. Mismatched Pastel Nails
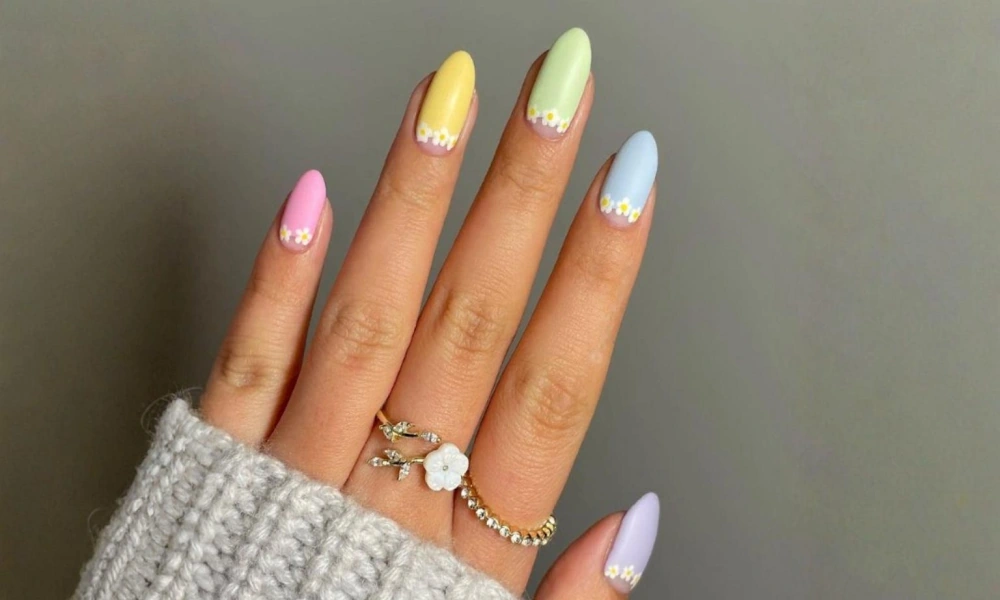
Mismatched pastel nails are one of the easiest ways to create a festive Easter manicure. Instead of using the same color on every nail, choose a different soft shade for each finger.
For example, you can use baby pink, butter yellow, mint, lilac, and sky blue across both hands. The colors create variety while keeping the manicure connected through one soft palette.
The most important part is choosing shades that look good together. Avoid mixing very bright colors with pale pastels if you want a gentle finish.
How to create the look:
- Choose three to five pastel shades.
- Keep the colors within the same soft or muted family.
- Paint one shade on each nail.
- Use the same finish across the set.
- Add a glossy top coat for a smooth appearance.
Best nail shape: Short square, round, or almond.
Best for: Easter brunch, family gatherings, spring outfits, and people who cannot choose just one color.
Salon request: “I want a pastel mismatched set with baby pink, mint, lilac, butter yellow, and sky blue. Please keep the colors soft and use the same glossy finish.”
2. Pastel French Tip Nails
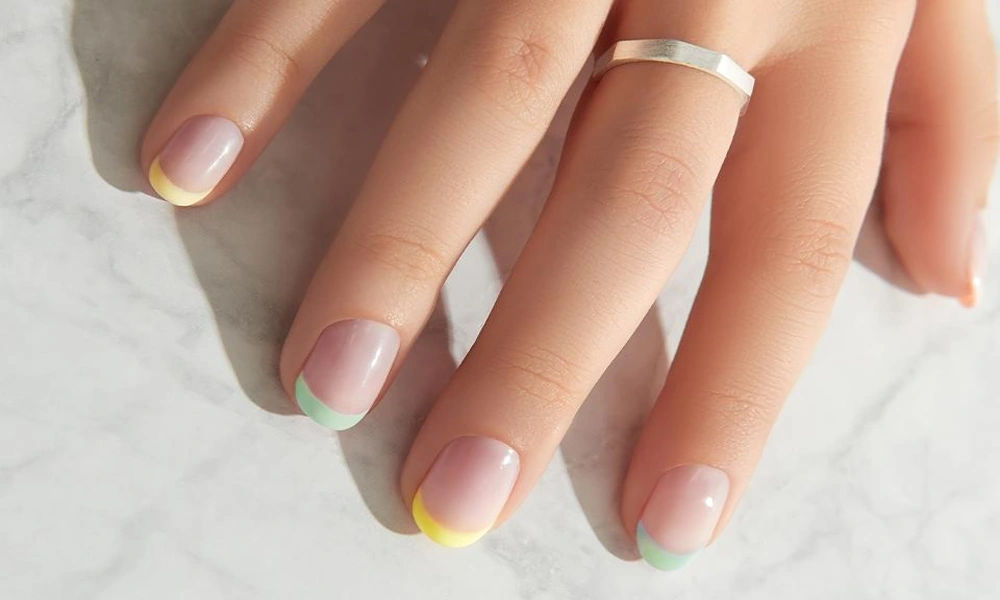
Pastel French tips are a clean way to add Easter colors without covering the entire nail. Instead of the traditional white tip, use butter yellow, mint, lilac, or baby pink over a sheer nude or cream base.
This design looks festive but remains simple enough for everyday wear. It is also a good option if you prefer a manicure that does not feel too themed.
You can use one color across all the tips or choose a different pastel for each finger.
How to create the look:
- Apply a sheer pink or cream base.
- Choose a pastel shade for the tips.
- Paint a thin, even line along each free edge.
- Keep the tip shape consistent.
- Finish with a clear top coat.
For short nails, thin tips usually look more balanced than wide, heavy lines. If you like this style, explore our guide to short French tip nails.
Best nail shape: Square, squoval, almond, or short round.
Best for: Brunch, work, family celebrations, and anyone who prefers a subtle Easter manicure.
Salon request: “I want a sheer pink base with thin pastel French tips. Use a mix of mint, lilac, and butter yellow.”
3. Jelly Pastel Nails
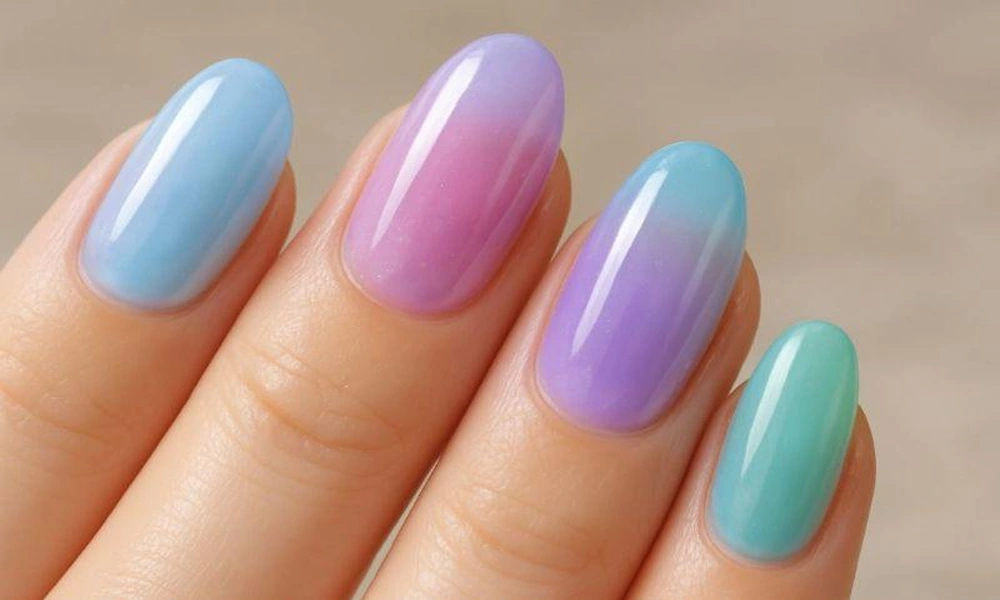
Jelly pastels use translucent polish to create a glossy, candy-like finish. The color looks soft because some of the natural nail remains visible underneath.
This design works with almost any pastel shade. Baby pink creates a gentle look, mint feels fresh, and lilac gives the manicure a slightly playful appearance.
Unlike opaque pastel polish, jelly colors have a lighter, see-through effect. You can build the color with additional layers if you want a deeper result.
How to create the look:
- Start with a clean nail surface.
- Apply a suitable base coat.
- Choose a translucent pastel polish.
- Add another thin layer if you want more color.
- Finish with a glossy top coat.
You can also use a different jelly shade on each nail. Keep the colors within the same family for a coordinated set.
Best nail shape: Short square, round, or almond.
Best for: People who like simple, shiny nails and want a soft color instead of a heavy design.
Salon request: “I want a translucent jelly finish in soft Easter pastel colors, with a glossy surface.”
4. Pastel Chrome Nails

Pastel chrome nails combine soft colors with a reflective finish. Instead of using a strong silver or gold metallic effect, the design uses a pale base with a delicate pearly or mirror-like shine.
For example, pale pink with pearl chrome creates a soft finish, while lilac chrome gives the manicure a slightly cooler appearance. Butter yellow and mint can also work well with a subtle reflective effect.
Chrome is a finish rather than a separate nail color, so the base shade matters. Ask your nail technician to show you the available chrome effects before choosing.
How to create the look:
- Select a pastel base shade.
- Apply the compatible nail product according to its instructions.
- Add the suitable chrome powder or topper.
- Seal the finish with the correct top coat.
- Keep extra nail art minimal so the reflective surface remains the main feature.
Best nail shape: Almond, square, or oval.
Best for: People who want a modern Easter manicure without obvious holiday drawings.
Salon request: “I want a soft pastel base with pearl chrome, not a strong metallic mirror finish.”
5. Micro Easter Egg Dot Nails

Micro egg dots add a small Easter-inspired detail without making the whole manicure look busy. You can place tiny dots on one accent nail or spread a few across a pastel base.
The dots can be arranged like small speckles on an Easter egg. Use white, cream, or a darker pastel shade to create a little contrast.
A dotting tool makes the design easier because it helps keep the dots similar in size. A fine brush can also work, but it requires more control.
How to create the look:
- Apply a pastel base such as mint, pink, or lilac.
- Let the base dry or cure according to the product instructions.
- Use a dotting tool to add tiny dots.
- Keep the dots spaced apart.
- Seal the design with a suitable top coat.
For a simple look, decorate only one or two nails. You can also use a different dot color on each accent nail.
Best nail shape: Short square, round, or oval.
Best for: People who want a small Easter detail without full nail art.
Salon request: “Please add tiny Easter egg-style dots to one or two nails over a soft pastel base.”
6. One Floral Accent Nail
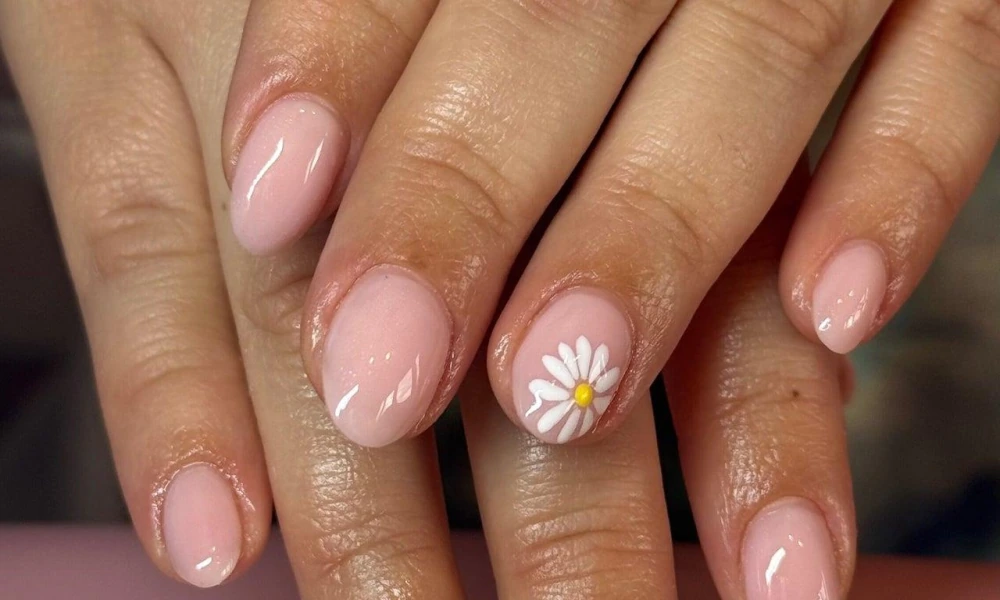
A floral accent nail adds a spring feeling to your manicure without requiring flowers on every finger. A simple five-petal daisy is one of the easiest designs to request.
Start with a sheer cream, baby pink, or pale blue base. Add one small flower to a feature nail, then keep the remaining nails in a matching solid pastel shade.
You can choose white petals with a yellow center for a classic daisy. If you prefer a softer design, use pale pink or lilac petals.
How to create the look:
- Choose a light base color.
- Use a dotting tool or fine brush to create five petals.
- Add a small yellow or cream center.
- Keep the flower small enough to leave space around it.
- Apply a suitable top coat after the design is dry or cured.
A single flower on each hand can look more balanced than a full floral pattern.
Best nail shape: Almond, round, short square, or oval.
Best for: Easter brunch, spring photos, weddings, and people who enjoy delicate nail art.
Salon request: “I want one small white daisy on each hand over a sheer pink or cream base.”
7. Bunny Silhouette Nail Art
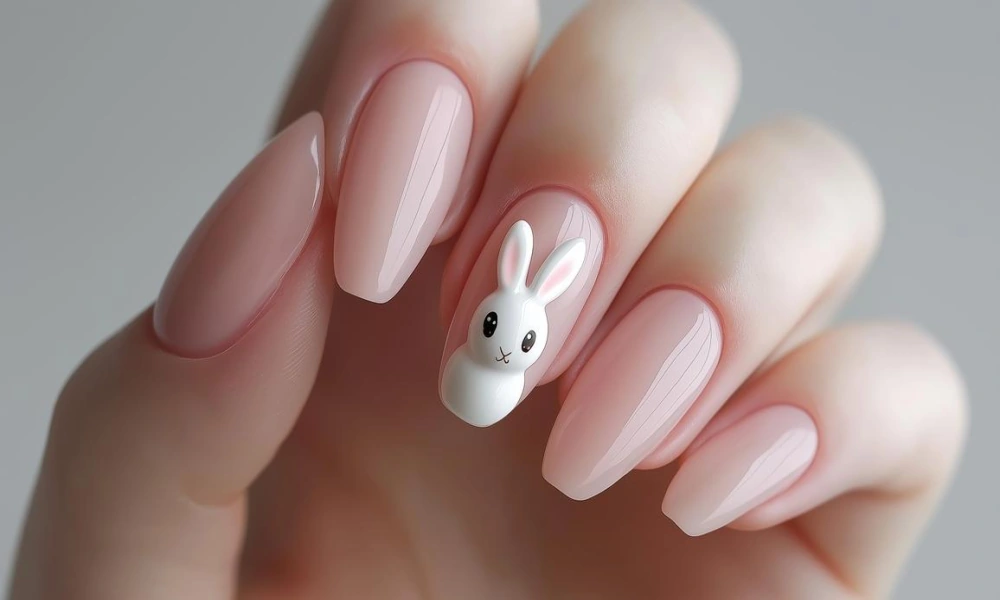
Bunny silhouette nails bring a recognizable Easter detail into your manicure. Instead of painting a large cartoon bunny, use a small outline or simple silhouette on one accent nail.
A tiny bunny can sit near the cuticle or in the center of the nail. Keep the remaining nails in soft pink, cream, lilac, or mint so the design does not become too busy.
You can choose a white bunny on a pastel base or a darker outline for more contrast. If you want a larger rabbit-themed design, you can explore the Funny Bunny nail style as a separate design direction.
How to create the look:
- Apply a pale pastel base.
- Use a fine nail-art brush to draw the bunny outline.
- Keep the ears and body simple.
- Add a tiny dot or small detail if needed.
- Seal the design with a top coat.
If you are not confident drawing the silhouette, ask your nail technician about a nail-art sticker or decal.
Best nail shape: Short square, almond, or oval.
Best for: Easter celebrations, playful manicures, and people who like small seasonal details.
Salon request: “I want one tiny bunny silhouette on an accent nail, with the rest of the nails in soft pastel colors.”
8. Gingham Pattern Accent Nails
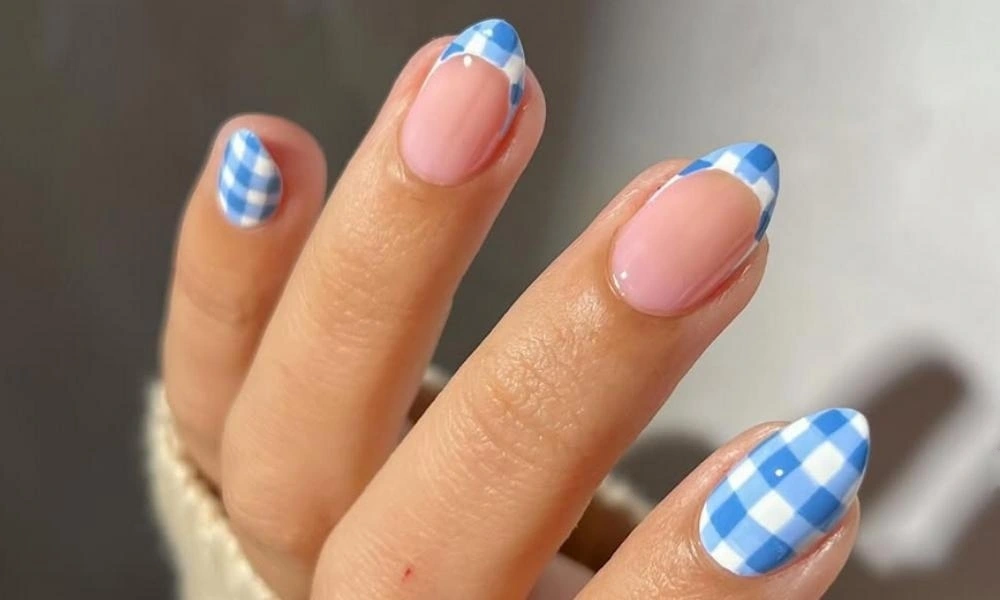
Gingham nails use a small check pattern inspired by picnic blankets and spring tablecloths. The design usually combines two colors, such as white and sky blue or cream and baby pink.
This pattern adds more detail than a simple dot or flower, so it works best on one or two nails. You can keep the remaining nails plain to balance the look.
The pattern is made by painting thin stripes in two directions. Where the lines overlap, the color becomes slightly darker and creates the check effect.
How to create the look:
- Apply a light base color.
- Paint thin vertical stripes using a second shade.
- Add horizontal stripes across them.
- Keep the spacing as even as possible.
- Allow the design to dry or cure as required.
- Seal with a suitable top coat.
A fine nail-art brush helps create cleaner lines. If you want a softer appearance, choose two light shades rather than strong contrasting colors.
Best nail shape: Short square, almond, or medium oval.
Best for: Easter brunch, spring picnics, and people who enjoy playful patterns.
Salon request: “I want a small gingham check on one or two nails using cream and pastel blue, with the rest kept simple.”
Easter Nail Color Palette: 6 Pastels to Build Your Look
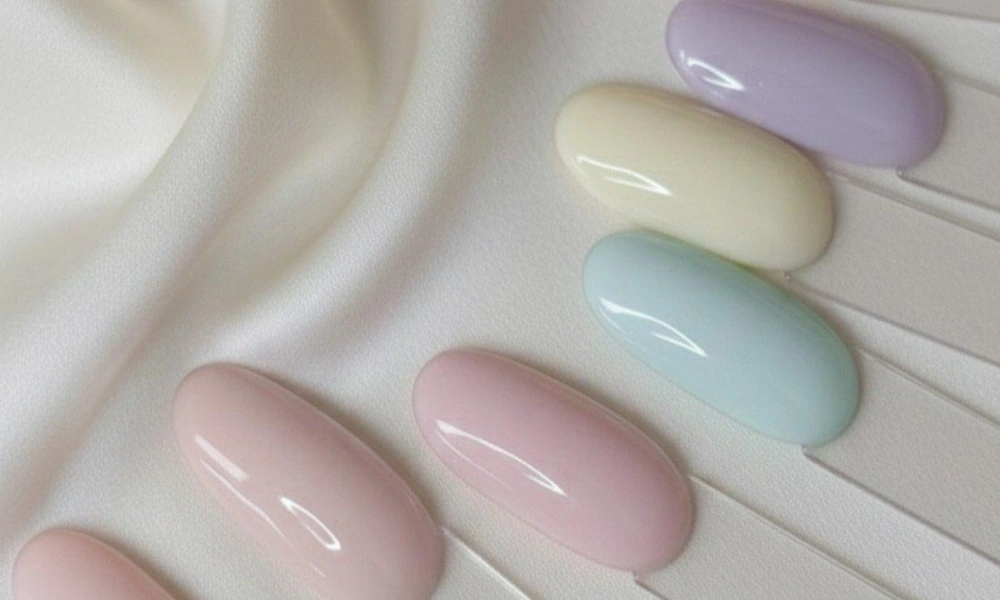
You do not need a large collection of polish colors to create an Easter manicure. Six shades can cover all eight designs and give you plenty of combinations.
The easiest approach is to choose one main color, one accent color, and a neutral shade. Cream and baby pink are especially useful because they work with flowers, French tips, dots, and other small details.
1. Butter Yellow
Butter yellow is a soft, warm shade that adds brightness without looking as strong as a vivid yellow.
Use it for French tips, mismatched sets, jelly finishes, or tiny decorative dots. It also works well with baby pink and cream.
Try it with: Baby pink, cream, or white.
2. Mint Green
Mint is a pale green with a fresh, cool appearance. It creates a clean spring manicure and works well with white details.
Use mint as a solid color, a French tip, or the base for small Easter egg dots.
Try it with: Cream, baby pink, or sky blue.
3. Soft Lilac
Lilac is a light purple that sits comfortably between pink and blue. It adds color without making the manicure look too bold.
Use it for jelly nails, pastel chrome, mismatched sets, or French tips.
Try it with: Baby pink, cream, or sky blue.
4. Baby Pink
Baby pink is one of the easiest colors to use in an Easter manicure. It works as a full base shade and pairs well with almost every other pastel in the palette.
Use it for French tips, floral accents, jelly finishes, or a simple glossy manicure.
Try it with: Butter yellow, lilac, mint, or cream.
5. Sky Blue
Sky blue adds a cool, clean color to the palette. It is especially useful for gingham patterns, tiny dots, and simple pastel combinations.
Use a pale shade if you want a soft look. A stronger blue can create more contrast against cream or pink.
Try it with: Cream, mint, or baby pink.
6. Cream
Cream is the neutral shade that helps the other pastels look coordinated. It can be used as a base for nail art or as a solid color between brighter pastel nails.
If you are unsure how to combine several colors, add cream to the set. It creates visual balance and prevents the design from looking overcrowded.
Try it with: Every color in the palette.
Pastel Nail Color Combinations That Work
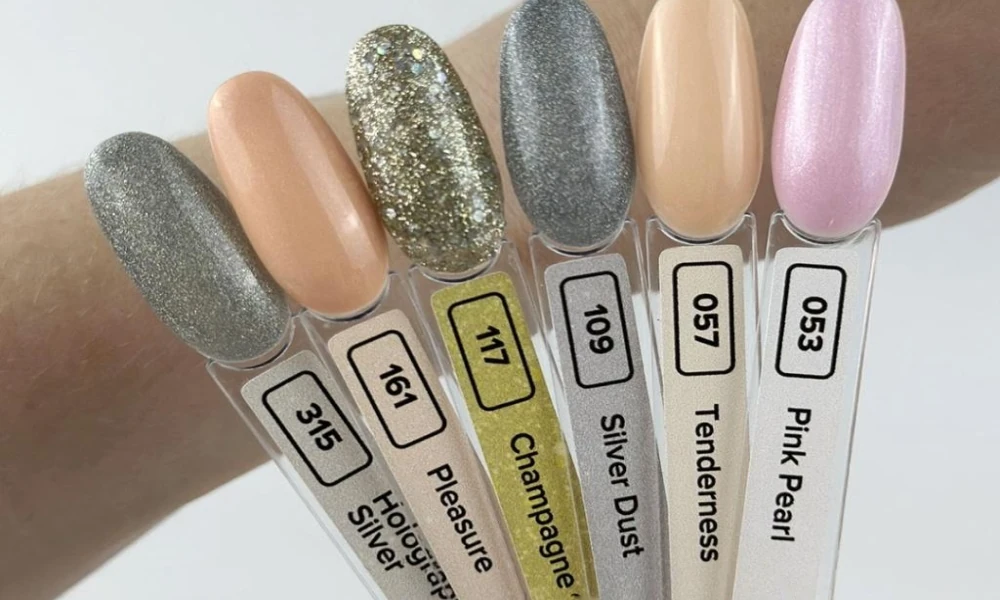
Choosing the right color combination is just as important as choosing the design. Two pastels can look beautiful together, but a third color or too much nail art can make the set feel crowded.
Use these simple combinations as a starting point.
| Base shade | Accent shade or design | Suggested finish |
|---|---|---|
| Baby pink | White daisy accent | Glossy |
| Sheer cream | Butter yellow French tip | Glossy |
| Mint | White micro egg dots | Matte or glossy |
| Sky blue | White gingham stripes | Matte or glossy |
| Lilac | Pearl chrome effect | Chrome |
| Butter yellow | Baby pink dots | Jelly or glossy |
| Cream | Mint French tips | Glossy |
| Baby pink | Lilac accent nail | Glossy |
Three Simple Rules for Mixing Pastels
1. Use a neutral to balance the colors.
Cream, sheer nude, and soft white help separate two pastel shades. This is especially useful when you are combining several colors in one manicure.
2. Keep the palette limited.
Two pastels plus one neutral are usually enough for a coordinated set. You can use more shades in a mismatched manicure, but keep them within the same soft color family.
3. Let one detail stand out.
If you choose pastel French tips, you may not need flowers, dots, and bunny art on the same nails. Pick one main feature and let the other nails support it.
Easter Nail Designs for Short Nails
You do not need long nails or extensions to enjoy an Easter manicure. Many pastel designs look especially neat on short natural nails because the details stay small.
Here are four options to consider:
| Design | Why it works on short nails |
|---|---|
| Pastel French tips | Thin lines add color without covering the nail |
| Micro egg dots | Small details do not need much space |
| One floral accent | A single flower keeps the design simple |
| Solid mismatched pastels | Different colors create interest without detailed art |
If you type, cook, travel, or work with your hands during the holiday, short nails may also feel more practical than long extensions.
Keep patterns small and avoid placing too many details on one nail. A simple design often looks clearer when there is enough empty space around it.
When to Book Your Easter Manicure
Easter dates change each year, so check the holiday calendar before arranging your appointment. If you plan to visit a salon during the holiday weekend, it is sensible to book ahead rather than relying on a walk-in appointment.
A practical booking plan looks like this:
- One to two weeks before Easter: Choose your design, save reference photos, and contact your salon.
- Several days before Easter: Confirm your appointment and the products or nail-art details you need.
- One or two days before your plans: Consider having the manicure done if you want it to look fresh for the weekend.
- Before leaving the salon: Check that the polish, top coat, and any decorations are properly finished.
The busiest booking days vary by salon and location. Ask your own salon about its holiday schedule instead of assuming every Thursday, Friday, or Saturday will be full.
Should You Choose Gel or Regular Nail Polish?
Both options can work for Easter nails. The better choice depends on how long you want to wear the manicure and how much time you have for application and removal.
| Feature | Regular polish | Gel polish |
|---|---|---|
| Curing | Usually air-dries | Cured under a suitable lamp |
| Application | Often simpler | Requires a specific product system |
| Finish | Can be glossy or matte | Often has a durable glossy finish |
| Removal | Usually uses nail polish remover | Requires the correct removal method for the product |
| Best for | Short events and simple home manicures | People who prefer a longer-wearing salon manicure |
Gel polish can remain on the nails longer than regular polish when applied and cared for correctly, but actual wear varies. It does not guarantee a chip-free manicure for a particular number of days.
If you choose gel, ask your technician how it should be removed. Avoid peeling or picking it off because this can damage the natural nail.
How to Create Easter Nails at Home
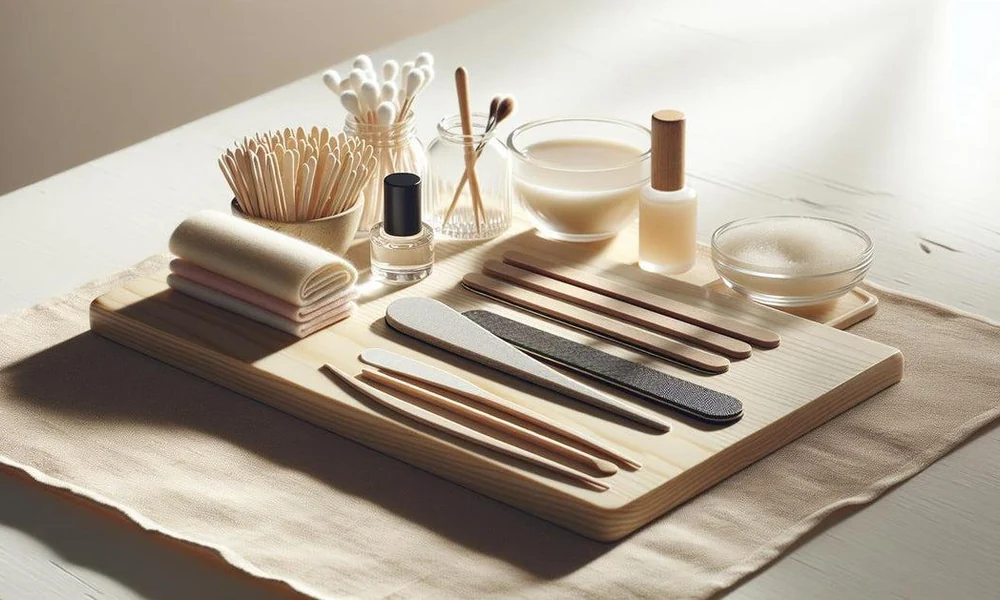
You can recreate several Easter nail designs at home without complicated tools. Pastel French tips, mismatched colors, dots, and simple flowers are good starting points.
What You Need
- Nail file
- Nail polish remover
- Base coat
- Two or more pastel nail polishes
- White or cream polish
- Dotting tool or fine nail-art brush
- Top coat
- Cotton buds for small corrections
Step-by-Step Easter Manicure
Step 1: Prepare your nails.
Remove old polish and gently file your nails into your preferred shape. Clean the nail surface before applying any product.
Step 2: Apply a base coat.
A base coat gives the polish a suitable surface and helps create an even manicure. Allow it to dry according to the product instructions.
Step 3: Apply your main pastel color.
Choose baby pink, mint, lilac, sky blue, butter yellow, or cream. Apply thin, even coats rather than one thick layer.
Step 4: Add your design.
Choose one simple detail, such as French tips, dots, a flower, or a small bunny silhouette. If you are new to nail art, practise the pattern on paper first.
Step 5: Let the design dry.
Give each layer enough time to dry. Applying top coat too early can smudge small details.
Step 6: Finish with top coat.
Apply a suitable top coat to protect the design and create an even finish. Follow the product instructions and avoid touching the manicure until it is dry.
Simple DIY Design Ideas for Beginners
- Mismatched pastels: Paint each nail a different pastel shade.
- Pastel French tips: Use a thin brush to add a colored line to the tips.
- Micro egg dots: Add small dots over a solid pastel base.
- One daisy: Use five small dots for the petals and one dot for the center.
Start with one accent nail rather than trying to decorate every finger. It is easier to correct mistakes and keep the final set balanced.
Expert Tips for Getting Easter Nails Right
The small details before and after your manicure can make a difference to the final result.
1. Book your appointment early. Easter falls on a different date each year. Contact your salon ahead of the holiday if you want a specific time or detailed nail art.
2. Prepare your reference photos. Save one main design and one backup. Tell your technician which colors, patterns, or finishes matter most.
3. Prepare your nails gently. Remove old polish and keep your nails clean. Avoid cutting or forcefully pushing back your cuticles.
4. Keep detailed art limited. One accent nail on each hand can be enough. This allows the pastel colors to remain the main feature.
5. Use the right tools for patterns. A dotting tool helps create even dots, while a fine brush is useful for French lines, bunny outlines, and gingham stripes.
6. Seal the design properly. Use a suitable top coat and follow the product instructions. Capping the free edge can help protect the polish, although it cannot prevent every chip.
7. Check salon hygiene. Choose a clean salon where tools are properly cleaned and disinfected. The American Academy of Dermatology’s manicure safety guidance explains what to look for and how to care for your nails.
8. Moisturize after your manicure. Nail polish remover and frequent washing can leave nails and surrounding skin dry. Use hand cream and cuticle moisturizer as part of your regular care.
Frequently Asked Questions About Easter Nails
What are the best Easter nail designs?
Some good Easter nail designs include mismatched pastel nails, pastel French tips, jelly finishes, pastel chrome, tiny egg dots, floral accents, bunny silhouettes, and gingham patterns. Choose a simple design if you prefer everyday wear or add one seasonal accent for a more festive look.
What colors are best for Easter nails?
Butter yellow, mint, lilac, baby pink, sky blue, and cream are versatile choices. They work together in mismatched sets, French tips, floral designs, and small decorative patterns.
How do I make Easter nails look elegant instead of childish?
Use soft colors and keep the seasonal details small. A pastel French manicure, one daisy accent, or a tiny bunny outline can look more subtle than large cartoon designs on every nail. Cream and sheer pink also help balance brighter colors.
Do Easter nail designs work on short nails?
Yes. Pastel French tips, micro dots, small flowers, and tiny bunny silhouettes can all work on short nails. Keep the artwork small and leave enough space around each detail so the design stays clear.
How do I create a mismatched pastel set at home?
Choose three to five pastels that look good together. Paint a different shade on each nail and keep the finish consistent. You can use cream or sheer pink as a neutral shade between stronger colors.
How far in advance should I book an Easter manicure?
Contact your salon one to two weeks before Easter if you want a particular appointment time or detailed design. Booking demand varies by location, so ask your salon about its holiday schedule.
Do pastel nail polishes need a base coat?
A base coat is a useful part of a regular manicure. It provides a suitable surface for polish and may help reduce direct contact between the color and natural nail. Follow the instructions for the specific product you use.
Is gel polish better than regular polish for Easter weekend?
Gel polish may be a better choice if you want a longer-wearing manicure, while regular polish can work well for a single event or a simple home manicure. Neither option guarantees a particular wear time. Choose based on your needs and follow the correct removal instructions.
Final Thoughts
A good Easter manicure does not need to be complicated. Start with a color palette you like, then choose a design that fits your nail length and plans for the holiday.
If you want something simple, try pastel French tips or a mismatched set. If you prefer a more playful look, add tiny egg dots, a daisy, a bunny silhouette, or a gingham accent.
You can also recreate several of these designs at home with a few pastel polishes and basic nail-art tools. Keep the colors coordinated, leave enough space around the details, and choose a finish that suits your routine.
The best Easter nails are the ones you enjoy wearing beyond the brunch table.
Disclaimer: Nail polish and enhancement products can cause irritation or allergic reactions in some people. Follow product instructions, avoid applying products to damaged skin, and do not pick or peel off nail coatings. If you notice persistent redness, swelling, pain, or a rash, stop using the product and seek advice from a qualified healthcare professional.









