

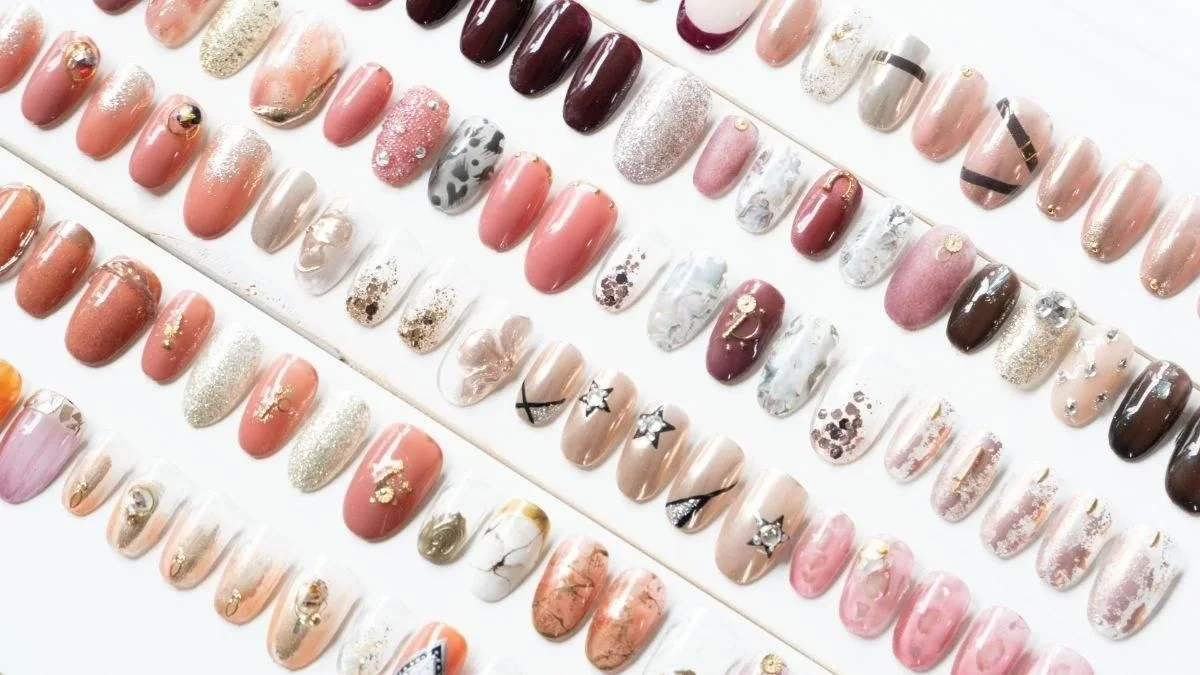
Choosing your next manicure should be exciting, but scrolling through hundreds of nail designs can make the decision difficult. One picture has a beautiful chrome finish, another has tiny stars, and a third combines several colors and patterns. They all look good, but which one will actually suit your hands and daily routine?
The easiest way to decide is to look beyond the picture. Think about your preferred nail length, the shape you like, the colors you wear, and how much time you want to spend maintaining your manicure.
Some nail ideas are simple and practical. Others need more detailed application and careful maintenance. A milky manicure, for example, can work for everyday wear, while a gem-covered set may be better for a special event.
This guide covers 12 nail ideas worth saving before your next appointment. You will also learn how to compare their maintenance needs, combine different designs, choose a suitable shape, and explain your reference photos to your nail technician.
Quick Answer: What Are the Best Nail Ideas to Try?
The best nail ideas combine a beautiful design with a finish, shape, and length that suit your lifestyle. Popular options include milky sheer nails, aura nails, chrome nails, jelly nails, glitter fades, micro French tips, star accents, gem designs, mismatched sets, animal prints, velvet nails, and statement red. Choose a simple design for easier maintenance or detailed nail art for special occasions. Before your appointment, save a reference photo and tell your nail technician your preferred color, finish, length, shape, and expected wear time.
Key Takeaways
- There are 12 nail ideas to consider, from milky sheer and jelly finishes to gems and statement red.
- Simple designs are generally easier to maintain than detailed sets.
- Gem accents and mismatched designs need more attention during wear.
- A consistent color palette helps different nail designs look connected.
- Nail length and shape can change how a design appears.
- Tell your nail technician your preferred finish, length, shape, and expected wear time.
- Choose a design that fits your daily routine, not just the reference photo.
12 Nail Ideas to Try at Your Next Appointment
1. Milky Sheer Nails
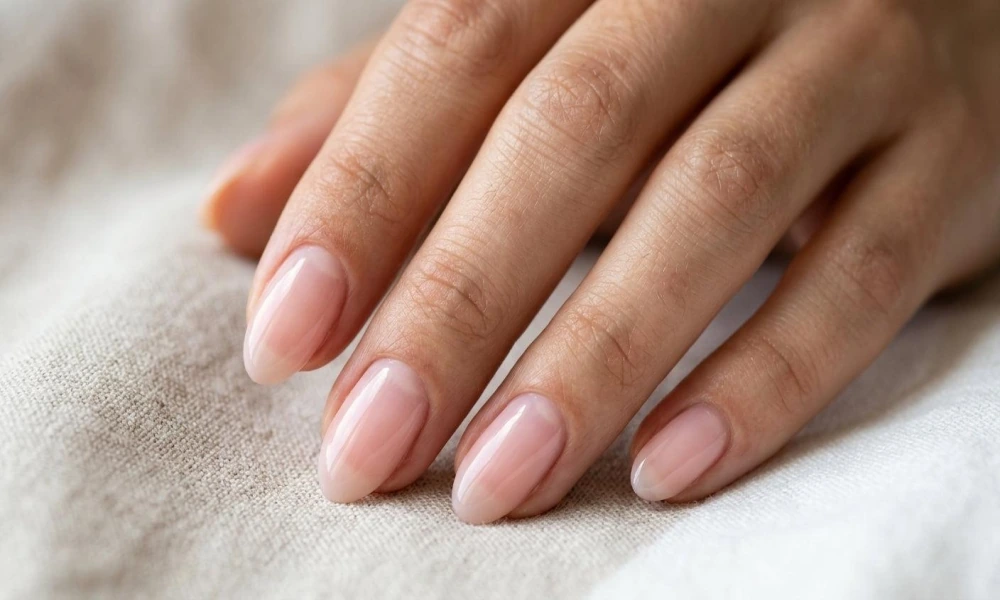
Milky sheer nails are a great choice when you want a clean, soft, and natural-looking manicure. This design uses translucent white, pale pink, or creamy nude polish to create a slightly cloudy finish. Unlike solid white polish, a sheer milky shade allows some of the natural nail to show through. This gives the manicure a softer appearance and makes it easy to pair with different outfits.
How to style milky sheer nails:
- Choose milky white for a clean, classic look.
- Try pale pink for a warmer, softer appearance.
- Add a glossy top coat for a smooth finish.
- Keep the nails short or medium for a simple everyday manicure.
- Add one pearl or tiny gem accent if you want a little detail.
Best for: Everyday wear, work, formal occasions, and people who prefer simple manicures.
Maintenance: Usually low. Natural growth can be less noticeable than it is with strongly contrasting colors.
What to tell your nail tech: “I want a translucent milky-white or pale-pink base with a smooth, glossy finish.”
2. Aura Nails
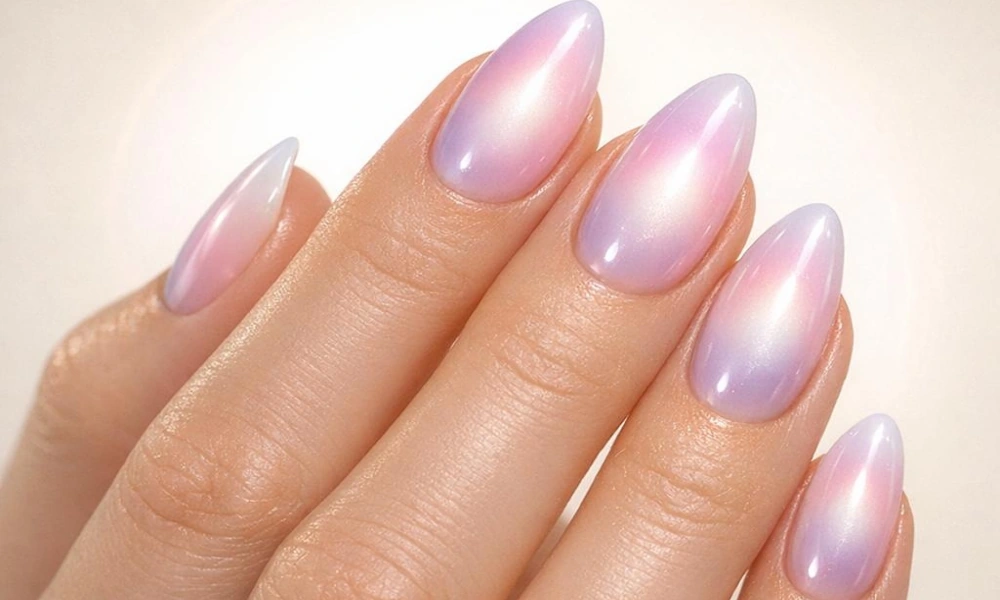
Aura nails feature a soft color blend that spreads outward from the center of each nail. The middle usually has a deeper shade, while the edges fade into a lighter background. This design creates a soft, airbrushed appearance. You can use two similar shades for a subtle result or choose contrasting colors for a stronger effect.
Popular combinations include pink and white, lavender and nude, peach and cream, and blue with a soft neutral base.
How to style aura nails:
- Use a pale base color to keep the design soft.
- Choose one deeper shade for the center.
- Blend the color gradually instead of creating a sharp circle.
- Use the same color combination across all nails for a coordinated set.
- Add a glossy top coat to finish the design.
Best for: People who like colorful manicures without using solid, bold colors.
Maintenance: Medium. The design itself may need more application time because the color blending requires care.
What to tell your nail tech: “I want a soft aura effect with a blended center and no harsh color edges.”
3. Chrome Nails

Chrome nails have a reflective finish that catches the light. Depending on the powder and base color, they can look like polished silver, pearl, rose gold, or a glazed surface. You can choose a full chrome manicure or use chrome as an accent over a softer base. Pearl chrome over pale pink, for example, creates a more subtle effect than mirror silver.
Popular chrome styles:
- Silver chrome: A bright, reflective metallic appearance.
- Pearl chrome: A soft shine with a delicate finish.
- Rose-gold chrome: A warmer metallic look.
- Glazed chrome: A smooth, pearly shine over a light base.
- Colored chrome: Reflective finishes in shades such as pink, blue, or purple.
How to style chrome nails:
- Choose the base color before selecting the chrome effect.
- Use pearl or glazed finishes for a softer look.
- Try silver or colored chrome for a stronger statement.
- Keep the nail art simple if the reflective finish is the main feature.
Best for: Parties, holidays, special occasions, and anyone who likes shiny finishes.
Maintenance: Medium. The reflective surface can lose some of its shine with wear, depending on the application and daily activities.
For application inspiration, see OPI’s chrome nail art tutorial.
What to tell your nail tech: “I want pearl chrome over a sheer pink base” or “I want a full silver mirror-chrome finish.”
4. Jelly Nails
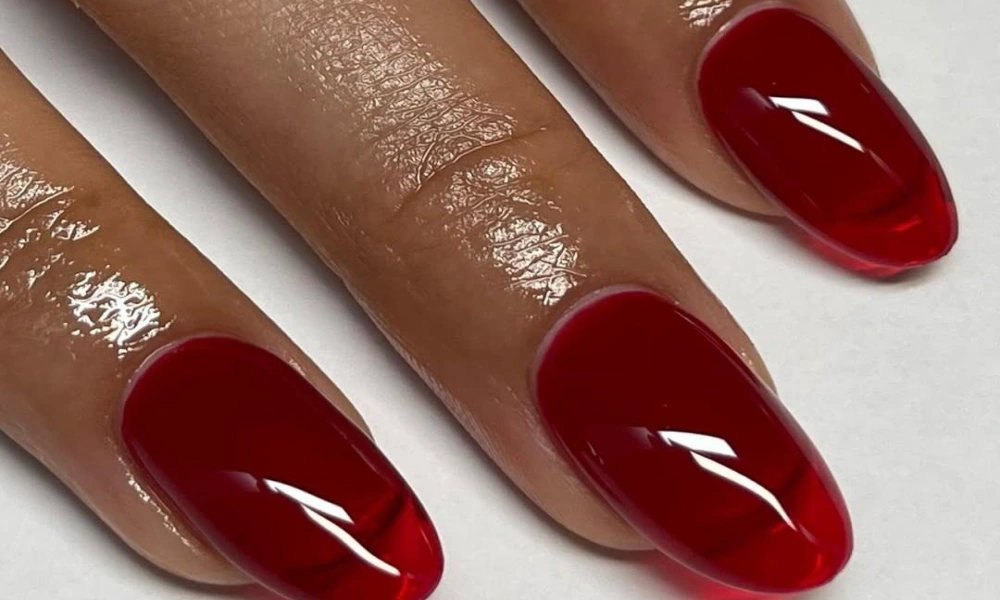
Jelly nails use translucent polish to create a glossy, glass-like appearance. The color is visible but not completely opaque, so some of the natural nail remains visible underneath. This style works with many shades, including cherry red, pink, peach, orange, and lavender. The final look depends on how transparent or deep you want the color to appear.
How to style jelly nails:
- Choose a transparent color for a light finish.
- Use additional layers for a deeper shade.
- Try cherry red for a playful, colorful manicure.
- Choose pale pink or peach for a softer result.
- Keep the design plain or add a small accent.
Best for: People who like colorful nails but do not want a heavy, opaque finish.
Maintenance: Generally low to medium. Simple jelly colors have fewer decorative details, although visible growth and chips still depend on the polish and application.
What to tell your nail tech: “I want a translucent jelly color, not a fully opaque polish.”
5. Glitter Fade Nails
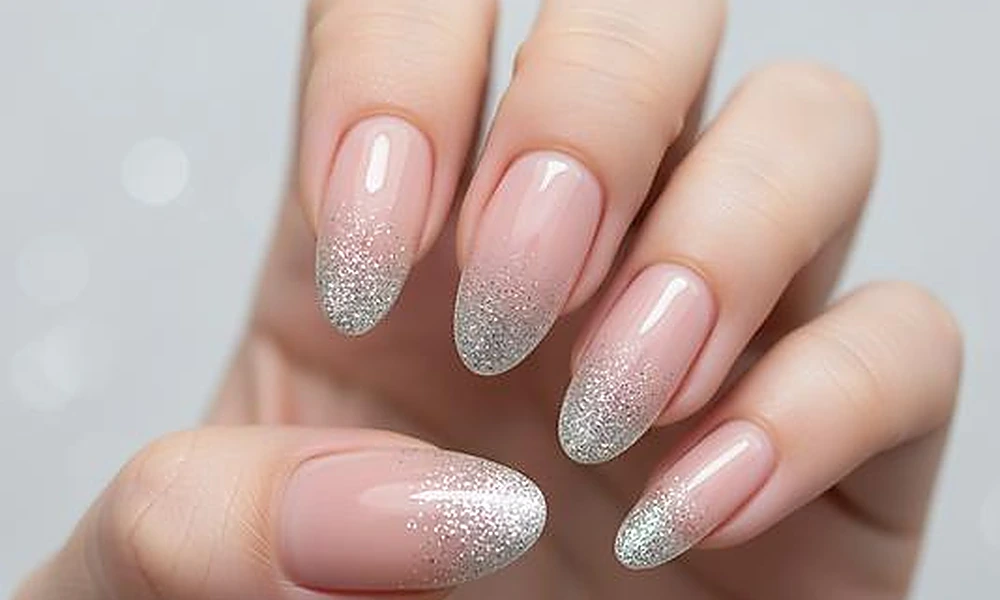
Glitter fade nails add sparkle gradually instead of covering the entire nail. The glitter can start near the cuticle and become lighter toward the tip, or the direction can be reversed. Fine glitter creates a delicate finish, while larger glitter pieces make the manicure more noticeable. You can also choose silver, gold, rose gold, or colored glitter.
How to style glitter fade nails:
- Use a nude, pink, or milky base.
- Choose fine glitter for a subtle effect.
- Place glitter near the tips for a French-inspired design.
- Keep the glitter concentrated on one or two nails for a simple set.
- Finish with a suitable top coat to create a smooth surface.
Best for: Celebrations, parties, weddings, and festive occasions.
Maintenance: Medium. A properly sealed surface helps prevent rough edges and snagging.
What to tell your nail tech: “I want a soft glitter fade over a neutral base, with the sparkle concentrated near the tips.”
6. Micro French Tip Nails
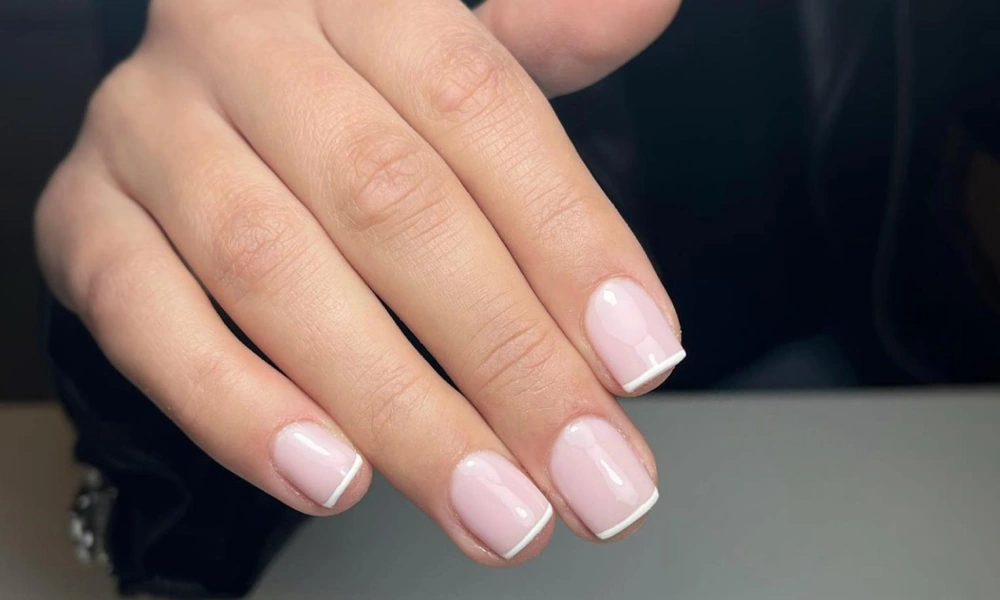
Micro French tips are a modern version of the classic French manicure. Instead of a wide white tip, this design uses a very thin line along the free edge of the nail. It works particularly well on short nails because the fine line does not take up much space. You can choose traditional white or try a different color for a more playful result.
How to style micro French tips:
- Use a sheer pink or nude base.
- Keep the tip line thin and even.
- Choose white for a classic look.
- Try black, brown, red, or another color for a different effect.
- Add a glossy top coat to make the line look clean.
Best for: Short nails, office-friendly manicures, and people who like simple designs.
Maintenance: Medium. The fine line needs accurate application, and chips can affect the clean appearance.
For more inspiration, see our guide to short French tip nails.
What to tell your nail tech: “I want a very thin French tip with a natural pink base.”
7. Star Accent Nails
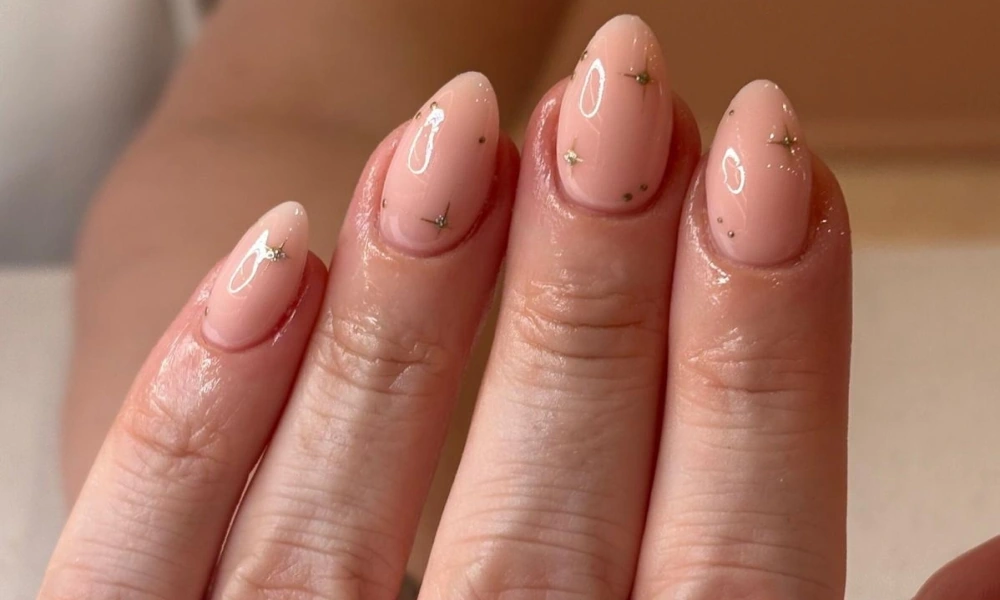
Star accent nails use small star details to create a simple celestial design. The stars can be painted by hand, applied as small decorations, or added as metallic details. You do not need stars on every nail. In fact, placing them on one or two nails per hand can make the design look more balanced.
How to style star nails:
- Use a nude, milky, or sheer pink base.
- Choose small silver or gold stars.
- Place one larger star on a feature nail.
- Mix tiny stars with a few simple dots.
- Keep the remaining nails plain.
Best for: People who like playful details, themed manicures, and delicate nail art.
Maintenance: Medium. Small decorations need secure placement so they do not loosen during everyday activities.
Explore our star nails guide for more celestial design inspiration.
What to tell your nail tech: “I want small star accents on two nails per hand, with the rest of the manicure kept simple.”
8. Gem Accent Nails
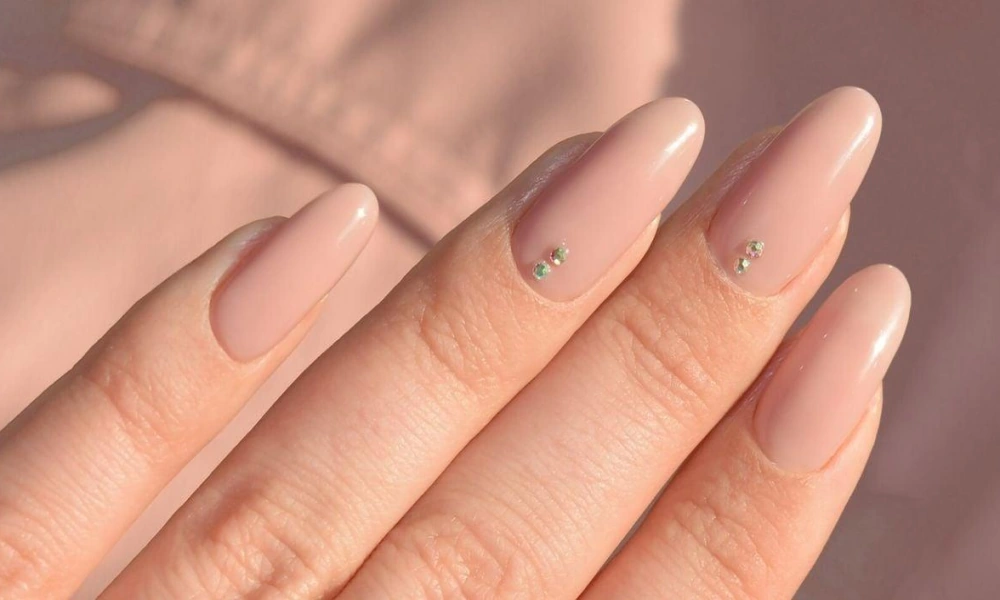
Gem nails use small stones or crystals to add shine and texture. You can place a single gem near the cuticle, create a small cluster, or decorate one feature nail. The main thing to consider is placement. Large or raised decorations can catch on clothing, hair, and other objects. A few carefully placed gems are often easier to manage than a full set covered in stones.
How to style gem nails:
- Use a simple nude or milky base.
- Place one small gem near the cuticle.
- Create a small crystal cluster on one feature nail.
- Match the gem color with the polish.
- Ask your technician to secure the decorations properly.
Best for: Weddings, birthdays, parties, and special events.
Maintenance: High compared with plain polish. Raised decorations can loosen or catch, so check them regularly.
What to tell your nail tech: “I want a few small, secure gems rather than large decorations on every nail.”
9. Mismatched Nail Sets
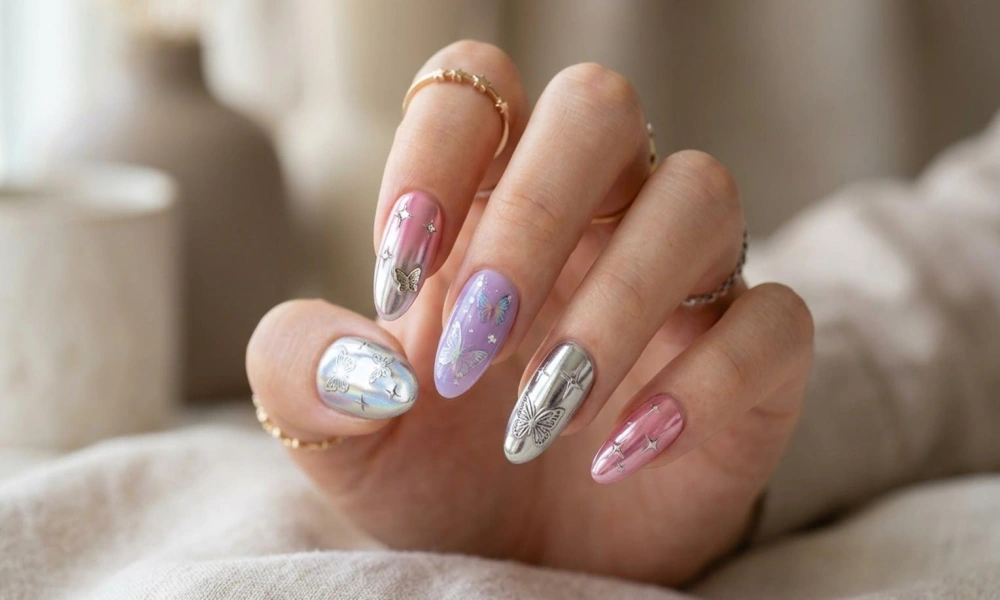
Mismatched nail sets use different designs across the same manicure. Instead of repeating one pattern on all ten nails, each nail can have a slightly different detail. For example, one nail might have a French tip, another might have chrome, and another might feature a small star. The designs still look connected because they share a color palette.
How to style a mismatched set:
- Choose two or three main colors.
- Pick one simple base design.
- Add one texture, such as chrome or glitter.
- Use a small accent such as a star or line.
- Repeat colors across the set to create balance.
Best for: People who enjoy creative manicures and want several details in one design.
Maintenance: High in terms of planning and application. Different details may also need different levels of care.
What to tell your nail tech: “I want a coordinated mismatched set using the same color palette, with a few different designs across the nails.”
10. Animal Print Nails
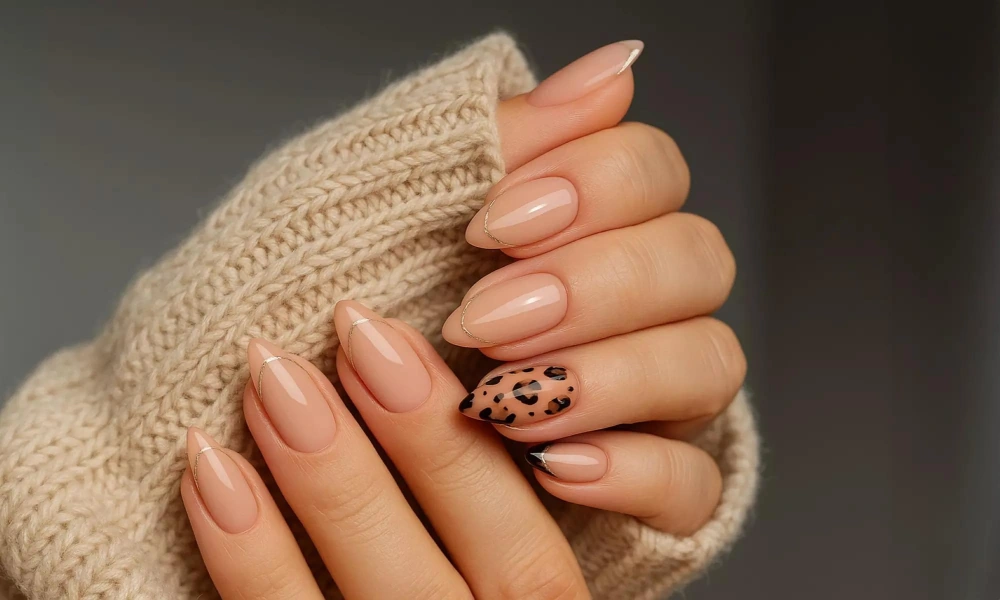
Animal print nails add a bold pattern to your manicure. Popular options include leopard spots, tortoiseshell effects, and zebra stripes. You can use animal print across every nail, but a small accent is often easier to wear. For example, combine one or two leopard-print nails with a solid nude or brown manicure.
How to style animal print nails:
- Choose leopard spots for a classic pattern.
- Try tortoiseshell for a layered brown effect.
- Use zebra stripes for a stronger black-and-white design.
- Keep the other nails in matching solid shades.
- Avoid adding too many unrelated colors.
Best for: People who like bold patterns and want a manicure with more personality.
Maintenance: Medium to high, depending on how much detailed art is included.
What to tell your nail tech: “I want a small animal-print accent with a neutral base and clean pattern details.”
11. Velvet Nails
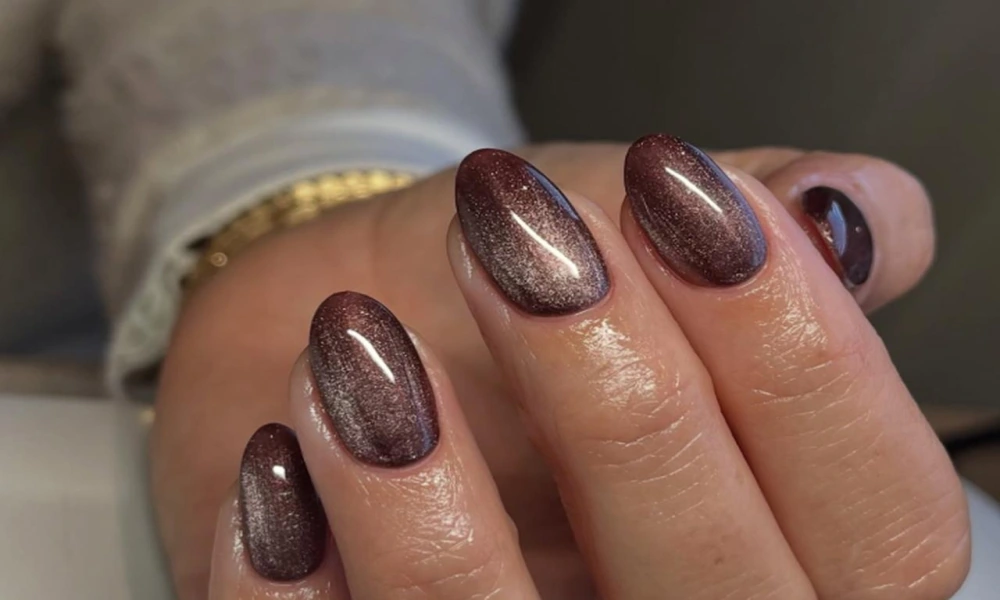
Velvet nails create a soft, shifting shine that changes as the light moves across the surface. The effect is often created with magnetic nail polish, which gives the color a dimensional appearance. You can choose soft nude and pink shades or darker colors such as green, burgundy, and navy. The final effect depends on the polish and the way the magnetic particles are arranged.
How to style velvet nails:
- Choose a soft shade for a subtle finish.
- Try a deep color for a more dramatic effect.
- Keep the shape simple if you want the velvet effect to stand out.
- Use one color across the set for a coordinated appearance.
- Ask your technician to show you the magnetic effect before finishing.
Best for: People who want a shiny manicure with more depth than regular polish.
Maintenance: Medium. The finish needs careful application, and its appearance can change with wear.
What to tell your nail tech: “I want a velvet magnetic finish with a soft, even shine.”
12. Statement Red Nails

Statement red nails are a classic option when you want your manicure to stand out without adding complicated nail art. Red comes in many shades. Bright cherry red creates a lively appearance, while deep wine and burgundy shades look darker and richer. You can also choose a glossy or matte finish.
How to style statement red nails:
- Choose cherry red for a bright, bold look.
- Try classic red for a timeless manicure.
- Use deep burgundy for a darker finish.
- Keep the nails plain for a clean statement.
- Add a single accent if you want a little variety.
Best for: Everyday style, dinners, parties, holidays, and people who enjoy bold colors.
Maintenance: Usually low in design complexity. However, chips and regrowth can be noticeable, especially with a strong, solid color.
For more color inspiration, visit our red nails guide.
What to tell your nail tech: “I want a glossy cherry-red manicure” or “I prefer a deep burgundy shade with a smooth finish.”
Nail Design Effort and Maintenance Comparison
Some nail ideas are easier to maintain than others. A simple sheer manicure usually needs less attention than a set with raised gems or detailed patterns.
Use this table to compare the general effort involved before choosing your design.
| Nail idea | Application effort | Maintenance considerations |
|---|---|---|
| Milky sheer | Low | Natural growth may be less noticeable |
| Aura | Medium | Color blending requires careful application |
| Chrome | Medium | Reflective shine can dull with wear |
| Jelly | Low | Simple color is easy to refresh |
| Glitter fade | Medium | Smooth sealing helps prevent rough edges |
| Micro French | Medium | Fine lines need accurate application |
| Star accents | Medium | Small decorations need secure placement |
| Gem accents | High | Raised pieces can catch or loosen |
| Mismatched set | High | Multiple designs take more planning |
| Animal print | Medium to high | Detailed patterns need careful application |
| Velvet | Medium | Magnetic effect requires careful application |
| Statement red | Low | Chips and regrowth can be more visible |
These are general estimates, not guaranteed wear times. Actual results depend on the product, nail preparation, application quality, natural nail growth, and your daily activities.
How to Choose Nail Ideas That Suit Your Lifestyle

A design may look beautiful in a photograph but feel inconvenient in everyday life. Before choosing a manicure, think about how you use your hands and how long you want to keep the set.
Choose a Design Based on Your Daily Routine
If you type frequently, work with your hands, or handle objects throughout the day, a shorter manicure with fewer raised decorations may be more practical. Milky sheer, jelly, and simple French tips are useful choices when you want a clean look without too much detail. If you have a special event coming up, you can consider more decorative options such as gems, glitter fades, and mismatched sets.
Choose Nail Ideas Based on Length
Nail length changes how much space you have for a design.
| Nail length | Suitable nail ideas |
|---|---|
| Short | Jelly, milky sheer, micro French, small stars |
| Medium | Aura, chrome, glitter fade, animal print |
| Long | Gem accents, detailed patterns, mismatched designs |
You do not need long extensions to enjoy nail art. Small designs can look just as good on natural, short nails.
Choose the Right Nail Shape
The same design can look different depending on the nail shape.
- Square: Creates a straight, defined tip. It works well with French tips and simple graphic designs.
- Almond: Has a soft tapered shape that suits delicate patterns and elegant finishes.
- Stiletto: Has a pointed tip that creates a dramatic appearance.
- Coffin: Has tapered sides and a flat tip, giving more space for detailed designs.
- Round: Follows the natural fingertip shape and works well for short, simple manicures.
If you are unsure which shape to choose, compare our square nails guide with our stiletto nails guide.
Consider Your Maintenance Budget
Detailed nail art may take longer to apply and can cost more than a simple manicure. Gems, intricate patterns, and several different finishes may also require additional attention.
If you want to keep things simple, choose one main color and add a small accent. You can still have an interesting manicure without decorating every nail.
How to Brief Your Nail Tech Before Your Appointment
A clear explanation helps your nail technician understand the design you want. A reference photo is useful, but it may not show every detail.
Before the appointment begins, explain these five things.
1. Bring a Main Reference Photo
Save one main photo and, if necessary, one backup. Explain which part of the design you like most.
For example, you may like the color in one photo but prefer the nail shape in another. Tell your technician so they know which details to follow.
2. Describe the Finish
Do not rely on color names alone. Explain whether you want:
- Glossy
- Matte
- Chrome
- Jelly
- Velvet
- Glitter
- Natural or sheer
The finish can change the entire appearance of a manicure.
3. State Your Preferred Length
Use a clear measurement or compare the length with your fingertip. The word “medium” can mean different things at different salons. If you want short nails, say that directly. If you want extensions, explain how long you want them.
4. Name Your Nail Shape
Tell your technician whether you prefer square, almond, coffin, round, or stiletto nails. If you are unsure, ask which shape works best with your natural nail length and condition.
5. Explain Your Expected Wear Time
Tell your technician whether you need the manicure for a short event or regular everyday wear. This helps them suggest a suitable design and application method. Also mention your budget and appointment time limit if either one matters.
How to Mix Different Nail Ideas in One Set
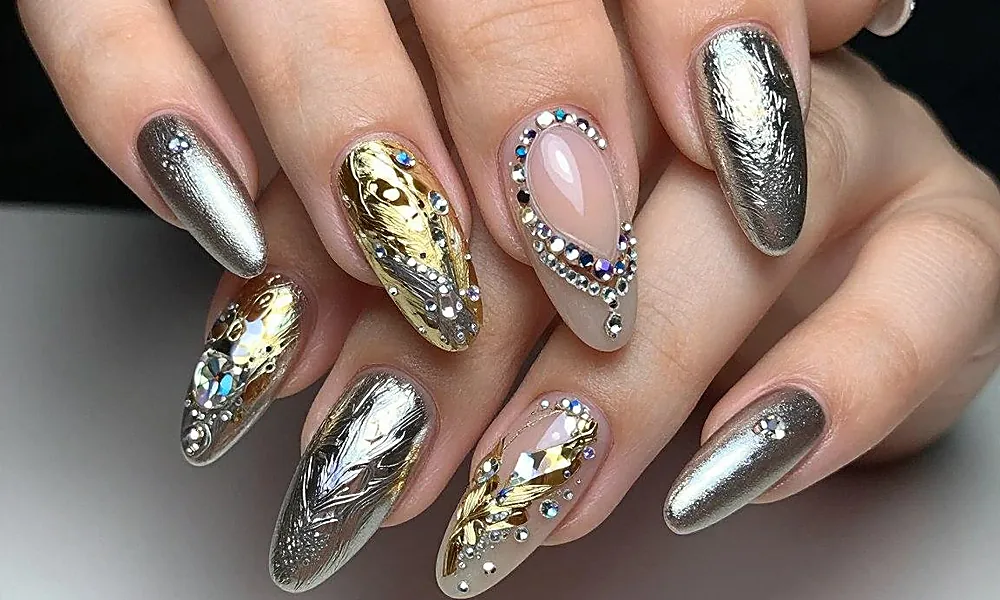
You can combine different nail ideas without making the manicure look crowded. The easiest method is to choose one main design, one texture, and one accent.
For example:
| Design element | Example |
|---|---|
| Base | Milky sheer polish |
| Texture | Pearl chrome on two nails |
| Accent | One small star on each hand |
Another combination could include a nude base, fine French tips, and one glitter accent nail.
The main goal is to keep the colors connected. If you choose warm nude shades, avoid adding several unrelated cool colors unless you want a strong contrast.
Try these simple rules:
- Keep one design as the main feature.
- Use one or two accent nails per hand.
- Repeat the main colors across the set.
- Avoid using too many different finishes.
- Keep detailed decorations away from nails that need to stay practical.
If two designs compete for attention, save one for your next appointment. You do not need to fit every idea into a single manicure.
Expert Tips for Choosing and Maintaining Your Nails
A little planning can prevent common manicure problems.
1. Save two reference photos. One main design and one backup are usually enough. Too many pictures can make your request confusing.
2. Match the design to your plans. Choose simple finishes for everyday wear and more detailed nail art for special occasions.
3. Describe the finish clearly. Saying “glossy pearl chrome over sheer pink” gives your technician more useful information than simply saying “light pink.”
4. Ask about application time. Detailed designs, gems, and mixed patterns may need a longer appointment.
5. Photograph your finished manicure. Your own photo helps you explain what you liked or want to change next time.
6. Look for good salon hygiene. Check that the work area and tools are clean. The American Academy of Dermatology’s manicure safety advice explains what to consider before getting a manicure.
7. Do not pick at lifting polish. Picking or pulling at nail products can damage the natural nail. Ask your technician about suitable repairs or safe removal.
8. Give your natural nails attention. Keep the skin around your nails moisturized and avoid forcing or cutting your cuticles. If you notice pain, swelling, or a skin reaction, stop using the product and seek medical advice when needed.
Frequently Asked Questions About Nail Ideas
What are some popular nail ideas to try?
Milky sheer nails, chrome finishes, jelly colors, French tips, aura effects, and small accent designs are useful options to consider. The best choice depends on your preferred style, nail length, and how much detail you want.
How do I choose a nail design that suits me?
Start with your daily routine and upcoming plans. Choose a simple finish if you want easier maintenance, or a detailed design if you are preparing for a special event. Then consider your nail length, shape, and preferred colors.
Which nail designs are easiest to maintain?
Simple sheer, jelly, and solid-color manicures are generally easier to maintain because they have fewer decorative details. They can also make small chips or natural growth less noticeable, depending on the shade and application.
Which nail designs need the most maintenance?
Gem accents and detailed mismatched sets often need more attention. Raised decorations can catch on objects, while intricate designs may be harder to repair if one nail gets damaged.
Do chrome nails last as long as regular gel nails?
Not necessarily. Wear depends on the product system, nail preparation, application, and daily activities. Chrome describes a finish, while gel describes an application system, so they are not direct alternatives. Ask your technician how the chrome effect will be sealed and maintained.
Can I combine two or three nail trends?
Yes. Choose one main design, one texture, and one accent. For example, a milky base with chrome on two nails and small star details can look balanced without becoming too busy.
What should I tell my nail tech before starting?
Show a reference photo, describe the finish, state your preferred length and shape, and explain how long you plan to wear the manicure. Mention your budget and time limit too if they affect your choice.
Are simple nail ideas better for everyday wear?
They can be more practical because they usually have fewer decorative details and need less complicated application. Milky sheer polish, jelly colors, and simple French tips are good options to consider for regular wear.
Can I get nail art on short natural nails?
Yes. Short nails can look beautiful with micro French tips, jelly colors, tiny stars, simple dots, and small accent designs. You do not need extensions to enjoy nail art.
Final Thoughts
The easiest way to get a manicure you love is to arrive with a clear idea of what you want. Save one or two photos, choose a finish and shape, and think about how much maintenance you can manage.
You do not need a complicated design to make your nails look good. A simple milky base, a clean French tip, or a small accent can be enough. Choose the look that fits your routine, explain it clearly, and let your nail technician help you make it work.
Disclaimer: Nail design results and wear times vary depending on nail condition, products, application, and daily activities. If you experience pain, swelling, irritation, or signs of infection, stop using the product and consult a qualified healthcare professional.









